Showing posts with label cleaning. Show all posts

April 24, 2012

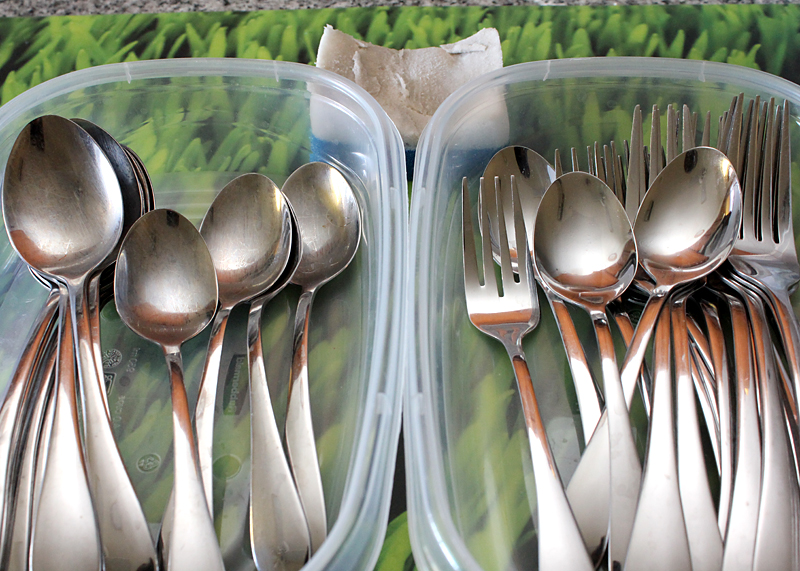
Less Stain from Stainless Flatware

If you're anything like me, you toss your used flatware in the sink, then gather all of them in the dishwasher waiting for the appliance to be full enough to run a wash. Then after about a year, you notice that your once-shiny stainless flatware are all cloudy and cruddy. You try to remove the crud by hand-washing the spoons and forks with a sponge and dish detergent but the shine never comes back.


If you're anything like me, you try "The Eraser" because it can clean everything!

Then you hear yourself scream, "Whoa! Check this out!"

Yes, the all-around Eraser (available as Mr. Clean Magic Eraser and Scotch Brite Easy Eraser) is the answer.


Wet the pad, slide it over the flatware surface just a few times, and watch the spoons and forks become shiny and new again! Rinse with clean water and towel dry. Revive several sets of stainful stainless flatware in just a few minutes.

If you're anything like me.

March 27, 2012

Dirty-Clean Dishwasher Sign

You know how you always wonder if the dishes in the dishwasher are still dirty or already clean? Our solution was to stick the corresponding post-it note on the door of the dishwasher. We had a "Clean Na" (clean already) and a "Dirty Pa" (still dirty) post-it that stays on the bulletin board until needed.

I got tired of managing and replacing the post-it note that sometimes fell on the floor (if not behind the water cooler), and got all crumpled, nasty, and unsticky. I thought I'd get creative and make a decent and real sign.

Because the front panel of our dishwasher from the 80s is plastic, a magnetic sign was out of the question. I had to design one that uses velcro as a fastener. And it has to be reversible and sturdy enough to withstand the constant reversing action. One side would be "CLEAN" and the other side "DIRTY".

I headed for my polymer clay workstation. Bluish grayish colors would work for the Dirty side, and bright whitish colors would be good for the Clean side. I cut an aluminum plate to serve as the backing and covered it with a thin layer of neutral brownish beige blended clay.


The letters had to be large and easy to read (and easy to make), so, arial-looking font was my default. Gray for Dirty, white for Clean.


I baked the letters and the backing first.


To make the sign more interesting, I designed sad and happy faces, and borders. I baked those elements next. Then I super-glued all the elements onto the backing, including the corner posts where the velcro-loop pieces would be attached.


And there it is. A reversible sign that snaps onto the velcro-hook pads I attached to the dishwasher. I threw away the post-it notes for the last time.


February 2, 2007

Cleaning Dried Eucalyptus

It was time to clean my dried flower arrangements. The last time I cleaned the one in the bathroom was... never. Not that they didn't really need any cleaning, but because it's a big arrangement with assorted flowers and reeds that it would really require a considerable block of time to clean them.

You wish you could just throw them in a bucket of sudsy water, shwish them around, pull them out, and shake them dry. But you can't. You have to hold each stalk and gently brush off the dust and dirt. You could lose a dried flower or break a twig here and there, but it's part of the cleaning process.

Most of my arrangements are eucalyptus -- I like them for their resiliency. The fragrance is distinct, although I've encountered some that get nasty after a while, smelling like old socks -- I think some driers mess with additive fragrances. But, dried eucalyptus really last forever.

So, I picked up my trusty soft-bristled paintbrush, took a seat out in the patio, dumped all the preserved eucalyptus branches, dried wheat stalks, mini-bamboos, twisted cane sticks, and dehydrated flowers on the round table, and went to work.

It took me about an hour to clean three floral arrangements. I re-arranged only enough for one vase. The rest, I laid out in an oversized shirt box to store for future use. I could've thrown them away... they're dead anyway. But I'm a certified card-carrying packrat, er, conservationist-recycler, who believes that every item in this world could potentially be a component of a revolutionary art piece. Okay, I'm a packrat. But look, these preserved eucalyptus leaves still look good after... so many years!

Eucalyptus leaves are particularly prone to dust... they attract dust... or more like dust clings to them for dear life. That's because the leaves and stems are naturally oily. Eucalyptus is preserved by letting them absorb water spiked with glycerin, an ingredient in the soap-making process. Effectively, the branches are "dry" but remain oily. Therefore, it requires a little patience to clean these branches because you have to brush both sides of each leaf to really do a good job. Blowing or "swiffer"-ing won't do. Well, consider it a zen experience -- not unlike pruning and shaping bonsai. Or, just like you polish your silver, you brush your dried eucalyptus.

Here are some photos I took during my zen moments:


April 19, 2006

Musty AC

Big Problem: Our apartment's air conditioning unit is giving off a musty smell.

Bigger Problem: The apartment maintenance guy came to clean the coils but did a piss-poor job; musty smell is still there.

Biggest Problem: My roommate is allergic to molds.

I took a look at the AC coils (the tubes containing freon that cools the attached fins that cools the air that flows through). OHMYGAWD! Many of the fins were sqwooshed flat (most likely from the last maintenance job, obviously long before we moved in), not to mention the mold and mildew growing all over the thing! I don't want to imagine what's cultivating behind the flattened fins! No wonder the apartment smells like a rain forest everytime the AC comes on!


Here's where my OCD kicked in. I had to straighten out all the fins and clean out all the mold! [I need to do this. And I need to do it now!]

My first challenge was what tool to use to un-flatten the flattened fins. [Tool - yes! I love tools!] Checked my tool cabinet and there was this putty knife. Tried that but it felt awkward -- not ergonomic.

Maybe I'll find a better tool in the... uhm... kitchen drawer. Found a plastic knife... that should work.

After a few un-flattened fins, I felt the upper edge of the knife was too wide -- some fins didn't straighten out nicely.

Back to the kitchen drawer. AHA! The orange peeler! Excellent. That worked.


When I finally straightened out all the fins, the next task was to clean out the gunk. Bought two implements to make this happen: a coil cleaner (foaming detergent in a spray can), and a water pump.


I sprayed the coils with the cleaner and used the water pump to flush out the loosened dirt.


I poked with the orange peeler and brushed with a bristle brush (some of the resident fungi were pretty well-anchored!), and flushed with water for almost two hours. Okay, more than three hours. I was surprised my ADD hadn't pulled me away sooner.

When it felt like I had fished out about a pound of moss and seaweed, I sprayed foam cleaner one last time, flushed with water one final round, and let my ADD take over. [I need to check my emails!] (Sometimes it's tough to have OCD and ADD at the same time.)


The coils don't look brand new (some stains are permanent), but I think I did a pretty good job -- certainly a lot better than that maintenance guy. Now to see if the roommate's histamine agrees with me.