September 7, 2014

Why Spaghetti Should Be Assembled at the Table

Many years ago, I was criticized for serving spaghetti un-assembled. “Uncooked” was the word used – because I brought my spaghetti to the table with the noodles not mixed with the sauce. I had always served it this way but since that comment, I conformed by mixing everything in the pot, at the stove.

Today, I decided to go back to my old way of serving spaghetti: the noodles are in a bowl separate from the meat sauce, with cheeses and peppers at the ready.


As I enjoyed my freshly-assembled personal portion of spaghetti, I was taken back to why I had always done it this way before. Here are my reasons for going back to assembling spaghetti at the table (after years of doing it the other way): 
  1. The noodles don’t suck up the sauce. When you mix the sauce and the noodles in the pot, the noodles absorb the sauce, so that by the time the dish reaches the table, the pasta is past the al dente stage.
  2. You determine the sauciness of your spaghetti portion. Do you want it dry-ish? Or soupy? Maybe you want more sauce than meat? More meat than sauce? You’re in control here.
  3. Your spaghetti meal can be your own creation. More cheese? Some hot pepper flakes? Sweet like the Pinoy spaghetti? Garlicky? With anchovies? You can whip up your own tasty concoction – you don’t have to be content with what the cook considers his masterpiece.
  4. Leftover already-mixed spaghetti is not very appetizing. After refrigeration, the sauce is dry and the noodles are too soft and fat. If the refrigerated sauce is separate from the noodles, you can reheat it to its original state. You can reheat the noodles with a little hot water, on the stove or in the microwave. Assemble at the table and you’ll forget that they’re leftovers.
So, do come by for my spaghetti. You know what to expect. Bon appetit! 

June 17, 2014

How to Freeze Grapes for Smoothies

Grapes are a staple in our morning smoothie because their sweetness neutralizes the “green” taste of the veggies. I chose to use frozen grapes to cool the smoothie just right. After a few trials and errors, I discovered the best way to freeze them.

The first thing I do is wash the bunch of grapes. Then I pick each grape from the vine so that I won’t have to deal with the stems later on. I roll them on a paper towel to dry them. Then I grab a colander and arrange them very nicely in one layer.

Freezing grapes in a colander.

Then I place the arrangement in the freezer. The colander helps freeze the grapes evenly and quickly. After a few hours, I transfer the grapes to a container that will reside in the freezer until all the fruits are consumed.


Frozen grapes for smoothies.

I don’t bother to put the frozen grapes in a zipper bag because they don’t last too long in the freezer anyway -- in about a couple of weeks, they’d have all been added to our smoothies. Every morning, I just quickly grab a handful to add to our drink.

Of course, I’ve tried freezing grapes in bunches – stems and vines together. But when I’m picking the fruits to put in my smoothie, I have to fumble with pulling out all the frozen little stems, and in the early hours of the morning, I don’t particularly appreciate cold fingertips.

I’ve also tried freezing individual grapes on a baking sheet and in a plastic container. They work fine but I find the colander trick the neatest yet. 

June 7, 2014

How to Slice Cantaloupe into Chunks

I remember growing up detesting one and only one dessert fruit – the cantaloupe.  In the Philippines, we call it melon (accent on the “lon”). Somehow I couldn’t tolerate the taste and texture, and I didn’t know why.

Then a friend convinced me to try the melon juice – sweetened cold water infused with melon flesh delicately grated from the fruit using a tool that creates long orange “worm” strips (I’ll write about that next time).  After I enjoyed that wonderfully refreshing and tasty drink, the cantaloupe and I became buddies.

Here in the US, cantaloupes are available in groceries as whole fruits, shrink-wrapped slices with the skin on, and chunks in clamshell containers. Naturally, they are most expensive when already prepared bite-size, ready to eat; the price of a small bowl of chunks is sometimes higher than that of a whole fresh harvest fruit.

So, whenever I feel prudent, I ignore the chunks, grab a whole fruit, and set my mind to slicing the cantaloupe myself. It’s really quite easy. Let me show you.

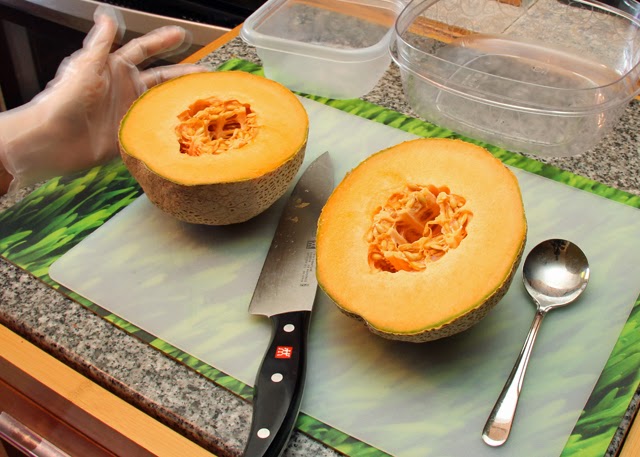
1. Get a whole cantaloupe. You will know it’s ripe and sweet when the skin is starting to get wrinkly and the fruit is giving off a sweet aroma. Grab a cutting board, kitchen knife, spoon, container for the seeds, and container for the chunks.  


Get a whole cantaloupe.

2. Slice the fruit in half. It doesn’t matter if it’s lengthwise or crosswise, because the fruit is generally round. I prefer to slice crosswise, but that’s just me.

Slice the cantaloupe in half.

3. Scoop out the seeds and fibrous material from the core of the fruit.

Scoop out the cantaloupe seeds.

4. Lay the half on the cutting board like an upside-down bowl. Slice off the skin by working from the top and down the sides.

Peel off the skin.

Peeled cantaloupe.

5. Make vertical cuts, about an inch wide, across the skinned half fruit.

Slice the cantaloupe.

6. Follow with 1-inch perpendicular cuts to create chunks. They won’t be the same sizes but you can follow-up with quick cuts to make the big chunks smaller.

Slice the cantaloupe into chunks.


Slice the cantaloupe into chunks.

Et voila! Bon appetit!

Cantaloupe chunks.


June 4, 2014

How to Slice Watermelon into Chunks

I grew up feasting on watermelon the old-fashioned way: sinking my teeth (and face!) into a freshly sliced wedge of that crunchy, cool, and juicy fruit (it’s also a vegetable) with its sugary-sweet nectar dripping down my chin, neck, and elbows! Slurp!

When I moved to the States, watermelon became a delicacy, presented as chunks sealed in clamshell packs at the supermarket. You need to use a fork (or tiny skewer) to eat it. Where’s the fun in that?

But yes, forking watermelon chunks makes sense these days because sticky hands don’t go well with our ubiquitous handheld devices. The downside of buying prepared watermelon is you pay a premium for the labor and packaging.

How about saving a bundle by buying a whole watermelon and spending a few minutes slicing it into chunks? I promise, it only takes a few minutes and you’ll have a big bowl of chunks you and your friends can conveniently fork into while you’re playing video or board games!

Let’s start.

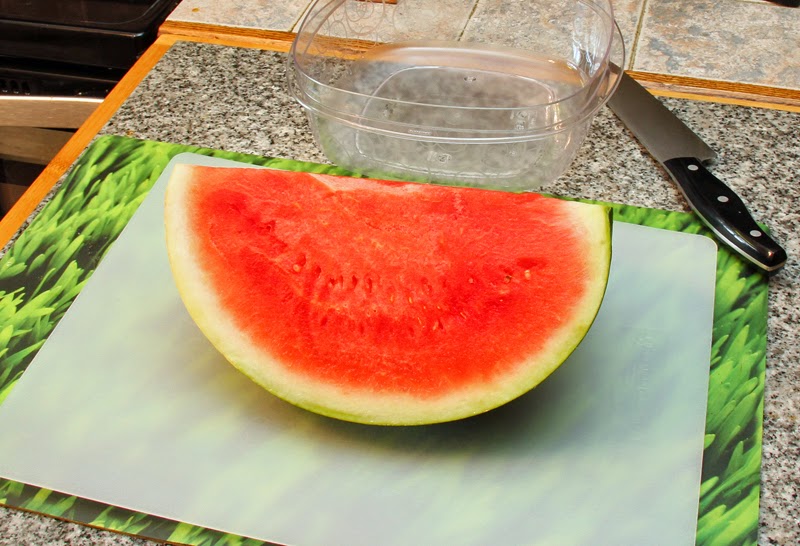
1. Buy a whole watermelon – the cheapest option. It’s going to be heavy, so plan ahead. If you won’t cut the entire fruit into chunks, you will need space in the fridge to store the uncut portion.

Watermelons

2. Slice the watermelon into quarters (some places sell watermelon quarters – you see the flesh and you don’t have to deal with a huge fruit). Work with a quarter at a time, unless you’re ready to consume the prepared chunks within 3-5 days (they get soggy and taste weird after a week).

Slice watermelon into quarters

3. Lay the quarter with the skin on top, away from you – it makes for easier, more stable cutting rather than if the skin were underneath. Trust me I’ve tried it all sorts of ways.

Slice watermelons into chunks

4. Make vertical cuts about an inch thick. Use a large kitchen knife to help with cutting through the skin. When done, switch to a paring knife and ready the container for the chunks.

Slice watermelons into chunks

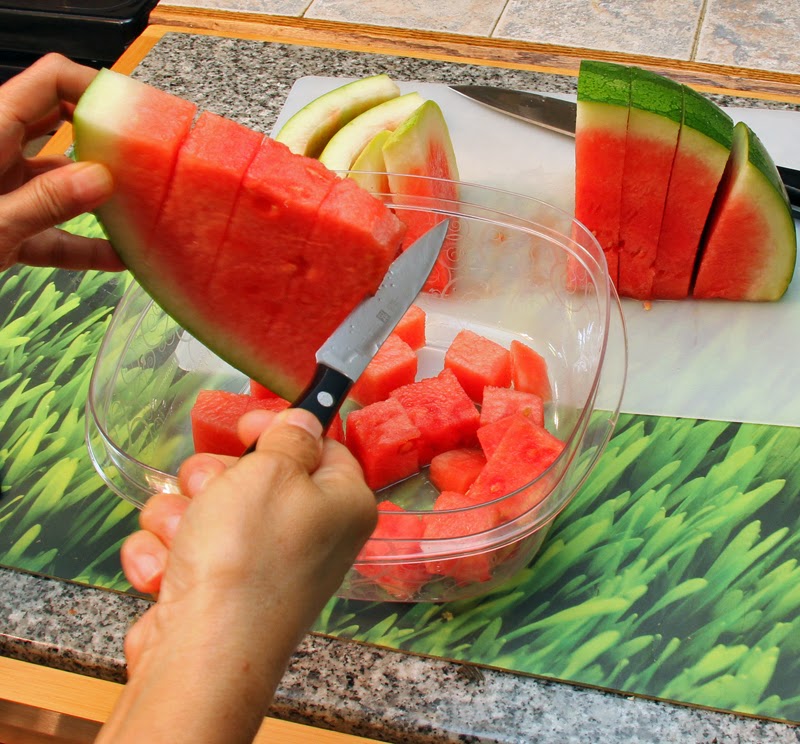
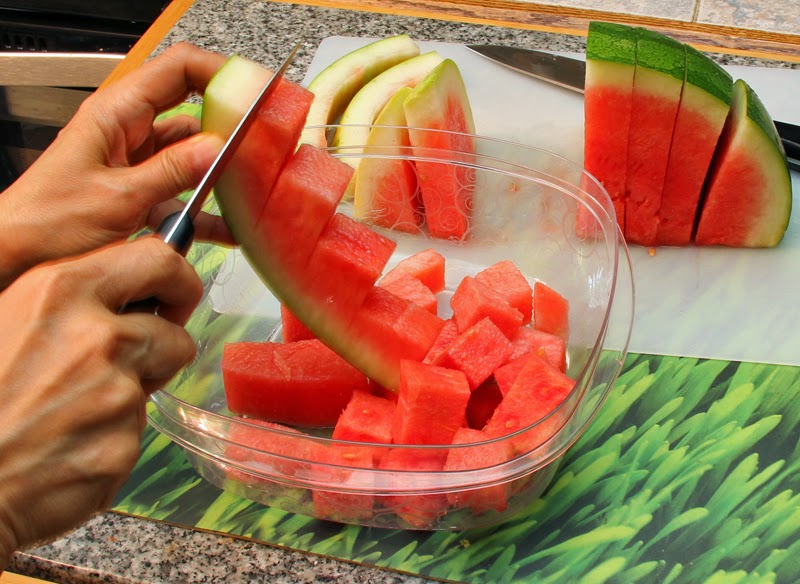
5. Pick up a slice and cut the flesh vertically about an inch thick, down to where the flesh meets the inside of the skin.       

Slice watermelons into chunks

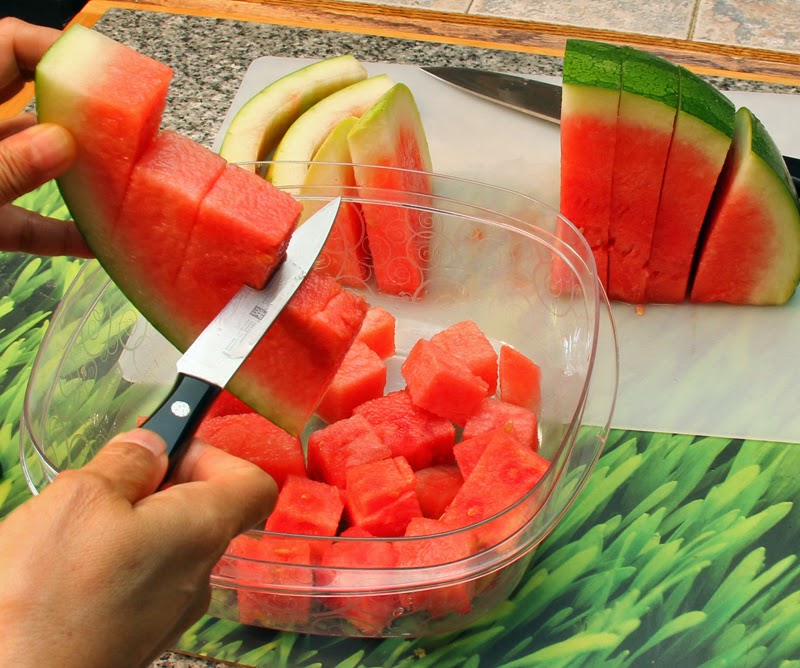
6. Make perpendicular cuts, also an inch thick, letting the chunks drop into the container.

Slice watermelons into chunks

Slice watermelons into chunks

7. Cut off the remainder of the flesh by running the knife from the top to the bottom of the slice, along the edge of the skin. Be careful not to nick your fingers!

Slice watermelons into chunks

Slice watermelons into chunks

Do the same with the rest of the slices, and there you have it. Look at how much a quarter of a regular watermelon yields! And no sticky chin!

Watermelon chunks


May 31, 2014

Cardboard Shadow Box Project

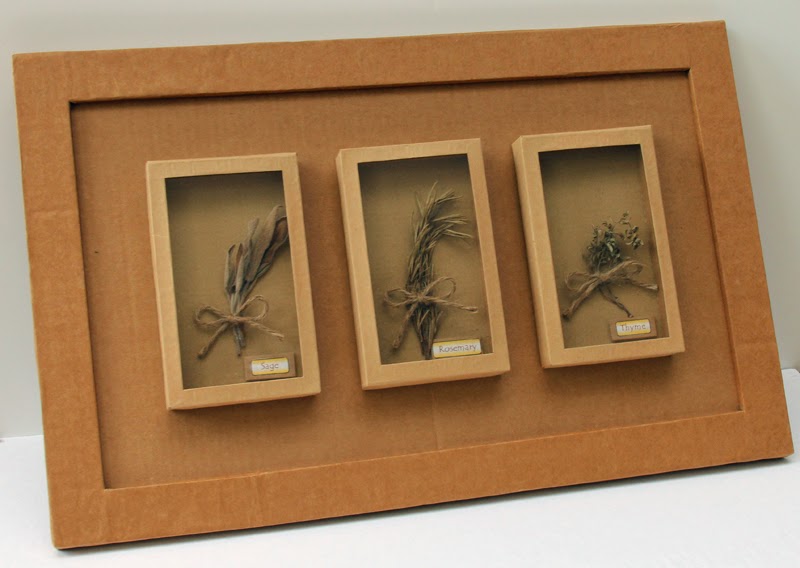
My creativity is mostly prompted by necessity. With no spare finances to purchase shadow boxes to encase some dried herbs I wanted to display, I resorted to making my own. My medium of choice was what I had plenty of: cardboard and brown paper.

First, I cut and glued cardboard pieces together to form small rectangular box frames and wrapped them with brown paper to cover the seams. For the window panes of the boxes, I used clear hard plastic cut out from product packaging that I had stored, thanks to my packrat foresight.

Cardboard Shadow Box

Then I prepared the backing for the shadow boxes. I printed out the names of the herbs and mounted them on tiny pieces of cardboard to serve as nameplates. Then I punched two holes in the middle of the backing, strung twine through, and tied down (with a nice ribbon knot) a bunch of the dried herbs I wanted to showcase.

Cardboard Shadow Box

Cardboard Shadow Box

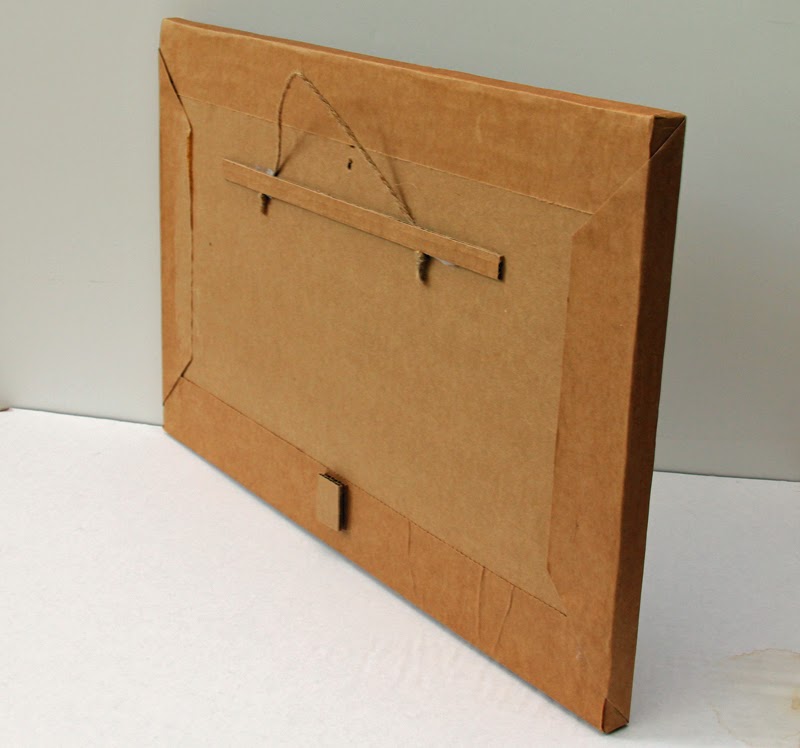
The final assembly was just a matter of gluing the backing to the shadow box frame, and gluing the finished box to the main frame that I prepared also with cardboard and brown paper. Add a twine hanger to the back, and there it is – all natural, very lightweight, and entirely handmade.

Cardboard Shadow Box - back

Cardboard Shadow Box for showcasing dried herbs

I took these pictures a few days ago, but I made the shadow box back in 2002 (which is why there are no step-by-step build photos). The herbs look old and droopy now but the presentation is still good.

May 26, 2014

How to Slice Pineapple Into Chunks

Pineapple season is here, and the “fruit,” which is actually a mass of berries growing along the bromeliad’s stalk, is once again popular in all grocery produce sections. It’s time to talk about how to slice them.

Born and raised in the Philippines (the top pineapple producing country in the world), I grew up with little appreciation for any kind of fruit juice other than pineapple. I also learned how to peel and cut pineapples without wasting any of the sweet and juicy flesh.

I’ve seen two convenient ways to prepare pineapples. One is to use a pineapple corer/slicer that cuts into the pineapple with a rotating blade and leaves the core and the skin behind. Another is to pare off the skin thick enough to include the “eyes” leaving a clean flesh for slicing. Both ways are quick and easy but wasteful because a lot of the delectable flesh is discarded in the process.

Here’s how I was taught to prepare a whole fresh pineapple into bite-size chunks without being wasteful [quick tip: wear plastic gloves to protect your hands from the acidic juices of the pineapple]:

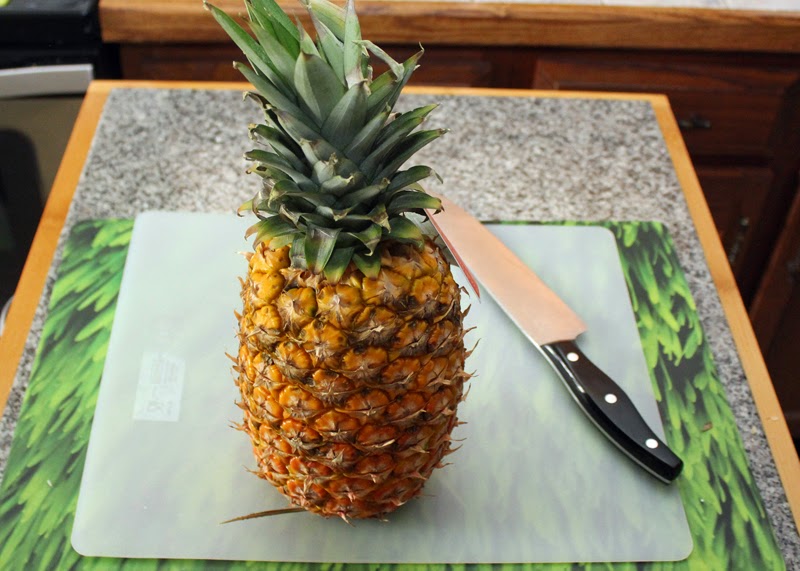
Del Monte Pineapple

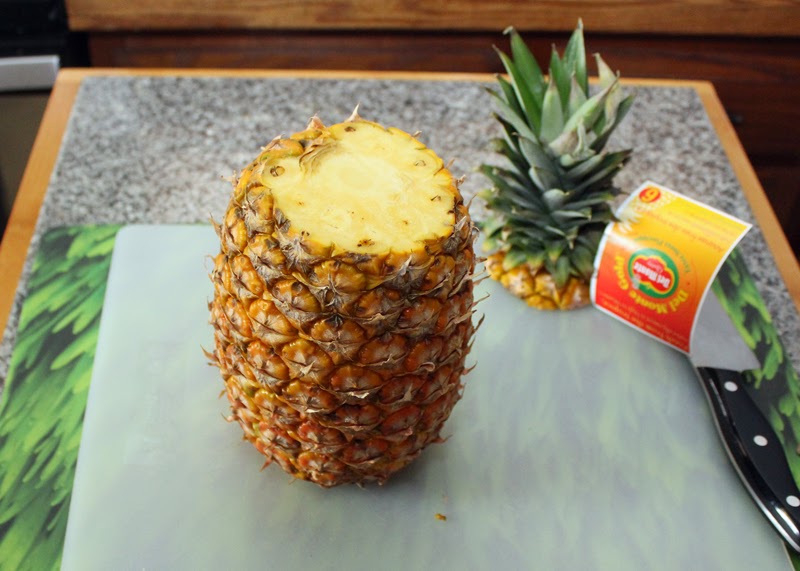
1. Slice the top off.  [Consider planting this top in your garden. It will take a couple of years before you can harvest your own one pineapple from it, which will most likely not be as big nor as sweet as what you could get from the grocery, but it’s always cool to say you grew your own!] Slice the bottom off too.

Pineapple - slice the top off.

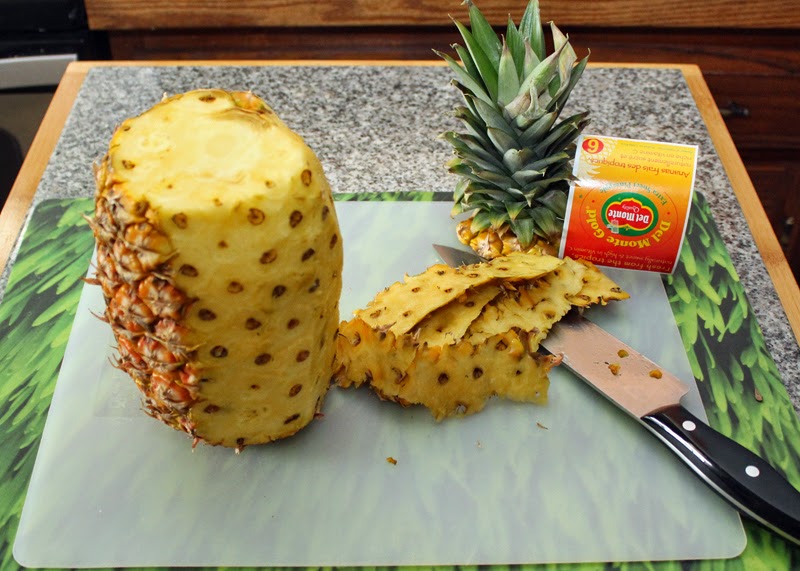
2. Cut away the skin just thin enough to expose the flesh. Parts of the “eyes” should still be on the fruit. You can skin the pineapple in a spiral or horizontally – I prefer to skin vertically.

Pineapple - cut away the skin.

3. Following the spiral pattern of the eyes, cut along the sides of the eyes to take them out. You can run the knife with one long spiral cut on one side of the eyes, from the top of the pineapple to the bottom, then a matching spiral cut on the other side of the eyes to scoop out the whole length. I usually work with two to three eyes at a time.   

Pineapple - take the eyes out.

Pineapple - take the eyes out.

4. Quarter the pineapple lengthwise and cut out the tough core. [Some folks who are into juicing don’t discard the core.]

Pineapple - quarter.

Pineapple - slice off the core.

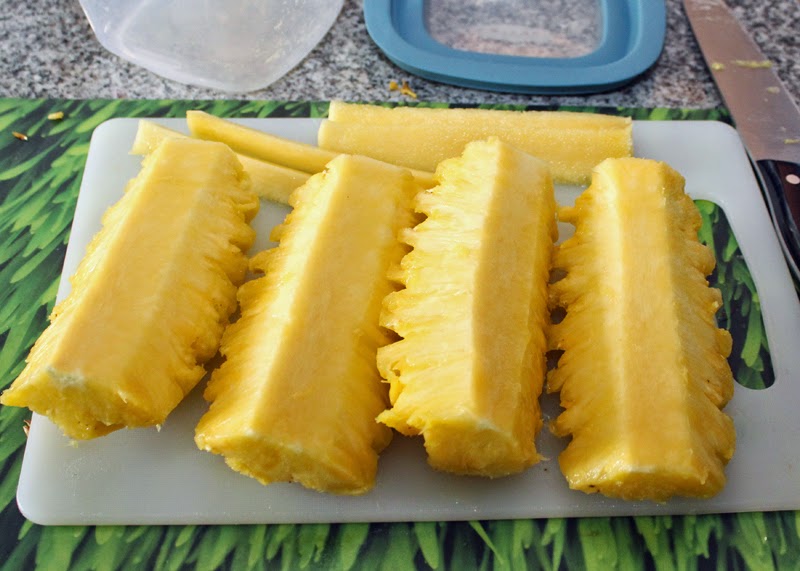
5. Halve each quarter lengthwise. Cut into bite-size pieces and enjoy!

Pineapple - slice lengthwise.

Pineapple - cut to bite-size pieces.


I enjoy my fresh pineapple chunks as is, with some salt or sugar, to flavor water, or as an ingredient of our breakfast smoothie. How do you enjoy yours? 

May 19, 2014

Breakfast Smoothie For Two

Our new massage therapist introduced us to the concept of taking raw fruits and vegetables first thing in the morning. While she was actually telling us about juicing, Mike and I decided that we would rather go with blending (aka smoothies). Juicing reduces the fruits and vegetables into liquid form, hastening absorption by the digestive system; blending chops and grinds the whole food, letting you consume the beneficial fiber of the fruits and vegetables.

After I did more research on the benefits and process of juicing and blending, I became more convinced that I prefer smoothies over juice. Besides, juicers are costly and harder to clean compared to blenders.

Our therapist suggested only three ingredients for the breakfast mix: carrots, cucumbers, and beets. She said that by taking these, first thing in the morning, we will not only become healthier but also feel better.

Because my research opened my eyes to this healthy sipping of plant nutrients, I thought: why not add what we’ve always known to be nutritious too, like celery, lettuce, spinach, ginger, and parsley? To neutralize the earthy taste of the beet root, I added strawberries, grapes, and banana. Nuts would be a great source of protein, so I threw in some chopped almonds. Then I read about the omega-3 and antioxidant properties of flaxseed, so I ground some and added that to our mix.

Breakfast Smoothie Ingredients

Breakfast Smoothie before blending

Sometimes I would vary the combination – oranges instead of strawberries, apple instead of banana. Sometimes the liquid would be no-sugar grape or apple juice, sometimes plain water. Most times I would add an infusion that we drink throughout the day: filtered water with slices of lemon, cucumber, and ginger (this one I learned from a friend who has been taking the infusion to keep her weight down).

Infused Water with Lemon Cucumber Ginger

Every morning, for the past 35 days, Mike and I have been having this smoothie for our first breakfast. To make the mixture refreshingly cool, I sometimes use frozen carrots, grapes, and strawberries, then throw in a couple of ice cubes. Some folks suggest frozen bananas or mixed berries.

Breakfast Smoothie before and after blending

Fruit and Vegetable Breakfast Smoothie for Two

So far, Mike and I appreciate the sipping of raw fruits and vegetables in the morning. It gives us a nice kickstart to our day. And with it, we’re already assured of ingesting at least two of the required number of servings per day. That’s certainly better than the “whenever” we were used to.

Here’s a quick list of what I include in one tall mug of our breakfast smoothie:
  • 5-7 sticks baby carrots (could be frozen)
  • 3-4 slices cucumber
  • 2 medium stalks celery
  • 2 thin slices ginger (more than that and the ginger taste dominates)
  • 1 thin slice beet root (makes the smoothie red)
  • 1 grab-full mixed greens (spinach, chard, lettuce, arugula, frisee, radicchio)
  • 1 small bunch parsley
  • 1 medium to large strawberry
  • 5-7 medium grapes (frozen is cool)
  • ½ ripe banana
  • 1 tablespoon crushed almonds
  • 1 tablespoon ground flaxseed
  • Ice cubes after blending
Other ingredients to try soon:
  • kale
  • broccoli
  • romaine
  • cantaloupe
  • mango
  • avocado
  • walnuts
  • cashews
  • chia seeds
  • blueberries
  • raspberries
  • blackberries
Why don't you try it? Then tell me how it goes.

May 15, 2014

Speed Bumps in the Highway of Life

While purging our paper files, I found a printout of my son’s LiveJournal entry for July 2002. Because it’s still a few days after Mother’s Day, I decided to share this mother-son exchange. It’s rather weird that today I am quoting that blog that quotes one of my defunct Suite101 Inspiration/Motivation articles that quotes my son. Nonetheless, just a few thoughts for when we hit those minor setbacks in our lives. 

~~~~~~~~~~~~~~~~~~~~~~~~~~~~~~~~
Date: 2002-07-19 22:01
Subject: speed bumps
Security: Public

A while back, I wrote my mother some e-mail about dealing with her carpal tunnel syndrome. For the unaware, CTS is the painful degradation of the delicate muscle-bone mechanisms that we call our hands. She wrote an article about it recently, and I'd like to share it here.

==============================

Screencap of Suite101 Inspiration/Motivation back in 2002
Welcome page of Suite101 Inspiration/Motivation 2002

Speed Bumps in the Highway of Life
By Ruby Bayan

Sometimes we want to believe we're immortal, or at the very least, immune to the frailties of human existence. Cancer happens to other people. Accidents happen to neighbors. Casualties fall on friends of friends. These gosh-awful things don't happen to us... until they do.

When I started calling myself a writer, I took all the precautions I knew, so that I wouldn't have to suffer what they call the "writer's syndrome" or CTS (carpal tunnel syndrome). I had an ergonomic chair, keyboard, and mouse. I was conscious of my posture, and took breaks from typing as often as I could.

It didn't occur to me that CTS would sneak up on me not from the keyboard but from packing and unpacking shelves of books and pieces of furniture from one house to another. My workouts didn't prepare my hands and arms enough for the torture I was going to subject them to when we relocated. As soon as I finished re-assembling and re-stocking our bookshelves, my hands literally died. CTS had set in.

I couldn't believe I had no strength at all to open a jar of peanut butter. A plastic bag of groceries felt heavier than a ton of bricks. Moving furniture -- out of the question. Typing sent tiny electric shocks through my fingers. Numb and painful hands woke me up in the middle of the night. I couldn't believe it. I felt miserable.

I told my folks about what had happened to me -- we had moved to a beautiful new home but in my excitement, I lost my hands. They all told me to take it easy, and to give my hands a rest. My son, ever fluent, and thinking otherwise, gave me the most powerful advice and encouragement I received:

"Hi, Mom. The source of CTS is the overexertion of the muscles through the wrist-joint mechanism. With the right amount of stretching and massaging, you can slowly counteract the damage, and realign the muscles within your wrist. It's going to take a lot of time and a lot of exercise, but I'm sure you can manage it. You always were the more diligent of the two of us.

"And what's this I hear about your not being able to move stuff around? I can understand not being able to do heavy lifting, but I do hope you're still keeping a moderately active metabolism. Fight the sedentary lifestyle -- there are people decades older than you and me who are still going strong because they just won't let it get them down.

"Be confident about your abilities. You were a mountaineer once. Don't just look back at it wistfully as an aspect of your past that you went through and moved on from. You're still that same person. You just haven't used the hardware in the same fashion in a while.

"I'm sure you can find the focus. Look back at all you've accomplished, and remember that you managed far more than the average individual because you felt like you could, and you went ahead and did it. Yes, acknowledge your limitations, but that doesn't mean you should just take it easy and take things for granted. It's all in the mindset, right?

"If you believe you can, then you won't take minor setbacks like momentary fatigue and muscular distress as if they were permanent roadblocks stopping you from walking down your old roads. Just think of them as speed bumps. You need to compensate for them, but darned if you're going to let them stop you, right?"

Ah, yes. My son gave me the gift of a bright and optimistic perspective: speed bumps in the highway of life. That's what this is. Just like all the other obstacles I have faced, I shall cope, I shall compensate. Then gain momentum once more, and cruise, and continue to enjoy the journey.

==============================

An uplifting postscript to Mom's article: her CTS is gone. Her hands have returned to full functionality, and she's doing great. If you'd like to get to know the true renaissance woman I call mother, mentor, friend and role model, visit her website 
here.

~~~~~~~~~~~~~~~~~~~~~~~~~~

April 26, 2014

Cthulhu Pendant

I’m back after a rather long hiatus. Had to attend to matters of consequence – and oh, ye, I learned a lot of new things during that hiatus. Maybe I’ll share them here one of these days. Today, I’m sharing my very first Cthulhu project.

Curiosity is what usually drives my creativity. I’m always curious how something will come out. I said, “I’d like to try making a Cthulhu pendant. Let’s see what happens.”

Using my favorite creativity medium, polymer clay, I mixed a few colors to form a dark greenish glob. Without a specific design to work with, other than the mental collage of various image renditions of the Lovecraft creature that I saw online, I let my fingers bring the clay to life.

Cthulhu Pendant - polymer clay

Head shape here, tentacles there, texturing here, and... Oh look! I’ve created a monster!

Cthulhu Pendant - polymer clay


After baking the clay, I used dark acrylic paint to add shades to the texture. When the paint dried, I coated the piece with Mod Podge to seal the colors in. Then I glued a pendant hanger to the back.
  
Cthulhu Pendant - polymer clay

 And here’s my Cthulhu necklace #1! 
 
Cthulhu Necklace

I took the project a little further by molding a silicone cast of the pendant, for if I become curious about what else I can make from it. My first try at using the silicone cast was with plaster, which was a fail because the tips of the tentacles broke off.

Cthulhu necklace project - silicone - plaster

Next time I’ll try resin. Just curious.

January 8, 2014

Dice Pouch Project

The challenge was to make several pouches for an assortment of board game dice. The pouches would be given away as tokens to fellow gamer friends. The options for the material to use were paper, netting, suede, felt, or any kind of fabric that would serve the purpose. Nothing too fancy; after all, the pouch just needed to hold seven regular-sized dice.

After pulling out a number of drawers of materials I could use, I remembered that I had scrap leather from an old jacket I bought at a garage sale. It’s genuine leather that has natural wear and distress. And even though the scrap pieces are relatively small sections, they would be just fine for the size of the pouches. This was what I had been waiting for -- the chance to recycle/repurpose that old leather jacket!

I went ahead and made a prototype – two sewn-together panels with holes for a pair of drawstrings. It came out really nice!

Dice Pouch Prototype

Leather Dice Pouch Prototype

Because the scrap leather had been in storage, I decided to give each section a good cleaning. We keep a bottle of leather cleaning and polishing solution for our boots, bags, and other leather goods – I put it to really good use!

After the clean-up and polish, I traced the pouch panel pattern on the leather. Because the leather’s wear patterns were not uniform, I made sure that the paired panels came from the same swatch or were at least similar in discoloration. While scissors were good for the panels, the rotary cutter was most efficient for cutting the drawstrings.

Leather dice pouch pattern

Punching the holes was next.

Leather dice pouch punching holes

Then I just sewed the panels together, smooth side in, and pushed the seam to flip the panels smooth side out. It’s with projects like this that I’m glad I have a heavy duty sewing machine.

Leather dice pouch sewing

What I like about leather is you don’t need to worry about the edges fraying -- construction of the pouches was quick and trouble-free.

What took the most time was threading the drawstrings. A crochet hook would help, but I discovered that a pair of tweezers made the job pretty easy.

And here are the leather pouches, ready to be filled with dice. Mission accomplished.


Leather dice pouch batch