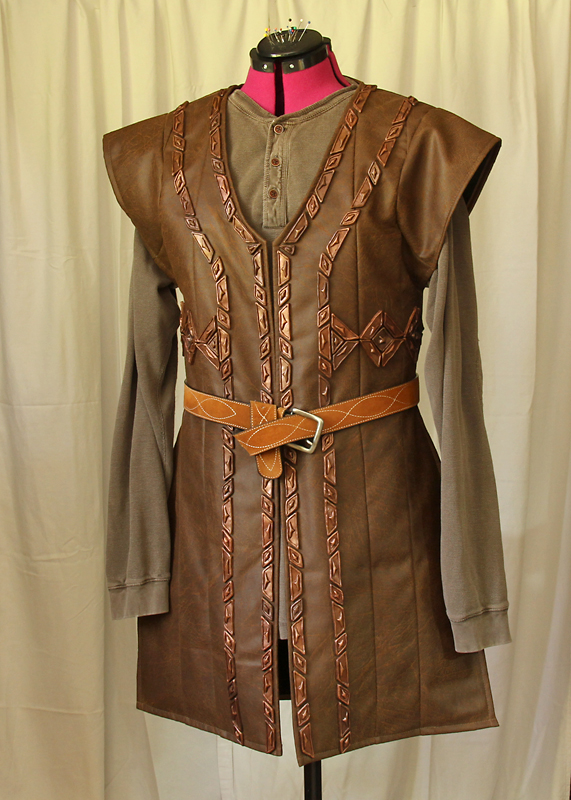
August 1, 2013

The Hobbit: Lord Elrond Costume: Prep

After the success of the costuming gig of my son’s friends at the premiere of The Hobbit: An Unexpected Journey, I started thinking, “My Thorin scalemail costume was a hit! Which Hobbit costume should I do next?”

I thought of making Nori, one of the dwarves, to help complete their roster, but when I asked my son if he would be okay wearing that costume, he wasn’t sure. I asked if he would rather be inside a helmet and armor, like maybe one of the elven guards. He replied, “If I’m going to be one of Elrond’s guards, I might as well be Lord Elrond.” And that was my go signal. The next costume project has been identified.

I googled all the images of Lord Elrond wearing the plate armor (there was only one stock image that was used to promote the movie, and Elrond appeared in the film in that armor for less than two minutes). With what was available, I diligently deconstructed the complex, layered costume so that I could wrap my head around the challenge. I tried to draw all the costume elements, figuring out how each piece would fit into the entire attire.

Lord Elrond costume deconstructed and sketched.


In determining the construction of the costume, my mandate to myself was to ensure that the attire would: (1) not maim my son, (2) be relatively easy to put on, and (3) stay intact for the duration of the costuming event (hopefully longer). Since I would be building everything from scratch, I had the freedom to choose the materials that approximate what they actually used in the movie.

Although the elven armor looks like sheet metal (which they probably forged for the movie), I wasn’t inclined to go that route. First, metal is expensive, and second, I’m not too hot on taking a crash course on metalsmithing just to make this costume (maybe next time). Ergo, I hopped around town to gather fabric (for the tunic and cape) and my chosen substitute for metal: marine vinyl.

Materials for Lord Elrond's costume.

My next challenge was figuring out how I would construct the silver trim along the edges, as well as the swirl designs, of all the plates of the armor. I tried sewing a silver piping. I tried gluing all sorts of silver ribbons. I tried strips of foam. I tried foam paint. I tried hot glue. I tried paint effects. Nothing worked. I took a breather.

Trying out what works in constructing Lord Elrond's costume.

I thought I should try to make a pattern for the pauldrons (shoulder armor). I said that if I could make the pauldron shapes look like the movie version, I’ll be good. I cut some paper, and I attached it to my dress form. It looked okay. I could do this.

First paper pattern of the pauldron of Lord Elrond's costume.

Then suddenly it dawned on me. I could do the edge trim, as well as the swirl designs, using my favorite medium: polymer clay. So I cut some vinyl using the paper patterns, molded some clay, and put them all together into a prototype. It worked!

Prototype pauldron of Lord Elrond's costume.

Ruby with elven ears, inspecting the Elrond pauldron prototype.

Pauldron prototype for Lord Elrond's costume.


So I decided to get as much clay as I could. When Michael’s put the Premo clay on sale for $1 each, I picked up all the silver ones from the three stores near our place.

Premo Sculpey Polymer Clay for the trim and swirl designs of Lord Elrond's costume.

I was ready.

Note: this next photo was taken after the costume was completed, but I will post it here now, to show the tools and accessories I used for the project. It doesn’t show the heavy duty sewing machine and the toaster oven (for baking polymer clay).

Tools, materials, and accessories used to create the Lord Elrond costume.

July 31, 2013

The Hobbit: Lord Elrond Costume: Circlet

Before I found the nerve to start working on the Lord Elrond costume, I decided to make the circlet. It was easy enough, looking at the photos, and at some finished products other people have made and put up for sale online.

Internet photo of Lord Elrond with circlet/crown.

I figured that I could make the crown using polymer clay, but it would need to have an armature, or a wire skeleton, so that the clay pieces don’t break. So, that’s what I did.
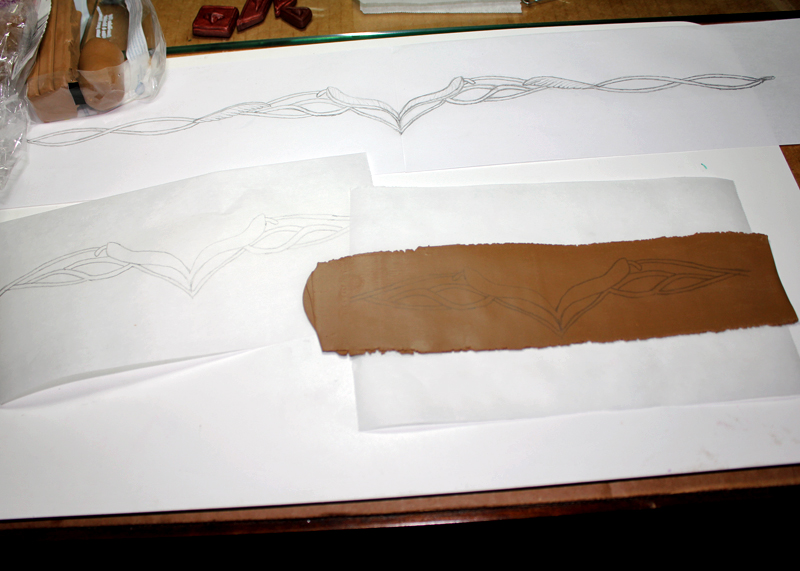
Circlet sketch and polymer clay medium.

Polymer clay form with wire skeleton.

Because my toaster oven for baking clay was just that, a toaster oven, a whole circlet would not fit in it. Therefore, I decided to make the crown in three segments. I baked the three pieces, glued them together afterwards, and painted the crown with metallic gold acrylic paint.

Elrond circlet clay form ready for baking.

Elrond circlet painted with metallic gold acrylic paint.

The crown came out very nice. I added a gold-colored chain that I found at Michaels. Looks handmade, but serves the purpose, I think.

Lord Elrond Circlet.

Lord Elrond Circlet handmade by Ruby Bayan.


June 9, 2013

Pirate Party Food Labels

The task was to make food labels for the dishes that would be served at a pirate-themed birthday party for a two-year old. The boy’s mother gave me a list of 11 food names that she already made up. The list included Dead Man’s Fingers (hotdogs), Cannonballs (meatballs), Salty Bones (pretzels), Parrot Wings (chicken wings), and Treasure (colored pasta salad).

Pirate Party Food Labels: Parrots Wings, Treasure, Catch of the Day

Of course, the first thing I did was Google pirate party food labels to get an idea of what others have created. And because the boy had been a huge fan of Jake and the Neverland Pirates, I tried looking for images I could use. Thank you, Internet, for the pictures! (Actually, Disney encourages pirate parties. Check out their "Planning a Pirate Party" page.)

So, here are the steps in making the pirate food labels that graced our birthday boy’s pirate party.

1. Gather all the images. Google and right click to “save image”. Jake and the Neverland Pirate images are available online in high resolution versions. Choose the skull-and-bones image to use for the flags. Pick a scroll image to use as the background of the text. Search for free fonts and pick a pirate type, then download so that you can use it on your image manipulation application (like Photoshop).

2. Arrange, size, and print your images. Print a sample and complete one prototype food label before making an entire batch.

3. Prepare the tools and materials: Barbecue sticks, olive skewers (snip off the sharp ends), black colored paper, adhesive tape, fancy scissors (wavy is good for the pirate theme), regular scissors, double-sided tape (or glue), hole puncher.

4. Print your images on regular bond paper.
Print out from online images.

5. Cut the labels and colored paper then tape (or glue together) to make the banners.
Pirate banners from barbecue sticks.

6. Punch the holes at the ends of the printed scrolls.
Punch holes on the scroll design.

7. Cut the skull-and-bones images into little flags and tape them onto the barbecue sticks.
Make tiny pirate flags.

8. Tape a barbecue stick onto the back of a banner.
Assemble the pirate party food labels.

9. Slide an olive skewer through the holes in the banner (this adds dimension to the banners), and secure the skewers with a small piece of tape to prevent them from slipping off.
Tape the barbecue stick and olive skewer to the banner.

And there you have it! 
Pirate party food labels.

Pirate party food labels.


Pirate party food labels: Ship n Dip, Salty Bones


Pirate party food labels: Sea Wrap and Dead Man's Fingers

Be creative in making up pirate names for the foodstuff you will serve at the party. Enjoy!

10/10/15 Update: I see that a lot of people come to my blog to check out these pirate party food labels. If you want me to make a set for you, please email me: rubybayan@gmail.com so that we can discuss. Please note that I am currently based in Manila. :)

May 19, 2013

Turbo Corn on the Cob


I used to cook corn unhusked in boiling water. Then we acquired a turbo broiler. I thought, if I can grill meat in the broiler, it makes sense that I can grill corn there too. Since then, I have never cooked corn any other way. Now our corn on the cob treats are juicy, tasty, and so addictive.

Here are the steps to cooking the best corn on the cob: 
  1. Purchase raw corn ears that look fresh. Avoid those that have dried husks. Peek into the husks to check that the kernels are plump and not drying out.
    Fresh raw corn
  2. Cut off the tips to remove the hair and the back ends. You might want to use a cleaver to chop off the back end – I twist the scissors around the base of the corn until the stalk is severed enough to allow me to break it off.
    Cut off tips of corn husk.

  3. Place them in the turbo broiler and set the temperature to 450 degrees F. 
    Place corn in turbo broiler.

  4. Cook for 20 minutes.
    Bake corn for 20 minutes.

  5. Enjoy!
    Enjoy juicy, tasty corn on the cob.

Remember: Corn is healthy food. It's what you add to the corn (salt, butter, cheese, mayonnaise, catsup, maple syrup, bacon, pot roast, full rack of ribs, etc.) that makes it unhealthy. Truth.


May 14, 2013

The Hobbit Costume Projects: Fili Vest


I volunteered to build the Fili vest for Nina, a friend who's costuming this Hobbit dwarf, mainly because I wanted to make the scales trim using polymer clay. Much like what I did for the Thorin scalemail shirt for Oneal.

Looking at the official Fili image, I figured I’d have to make roughly 150 scales. I estimated I would need 7-10 pieces of 2-oz brown/copper/beige polymer clay bricks. I also figured I’d require about a yard of 54-inch wide material, preferably faux leather or costume suede. I found everything I needed at a crafts and fabric store and bought them with discount coupons.

I worked on the scales first. I had made a positive and a negative mold of the four different forms, so it was just a matter of pulling 150 positives. Bake, then paint, and done!


Scales for Fili vest made from polymer clay


It was my first time to sew a vest, and my first time to work with suede (definitely more manageable than marine vinyl). So, I was learning as I went along. More like winging it.

Guided by the measurements Nina sent me, I cut a paper pattern. I thought I had it right but after I had cut the fabric, I realized I could’ve done a Dolman sleeve instead of a regular sleeve. That would have been easier to sew, and would’ve looked closer to the Fili original. But, with no extra material to revise my design, I went ahead with what I had already cut.

Costume Suede or Distressed Suede


It was nice working with the costume suede because it doesn’t fray (didn't have to do any serging). And the fabric surface, while feeling a bit plastic-y, does not get tacky under the sewing machine’s pressure foot. I just had to guide the material so that it wouldn’t swerve too much.

Fili vest work in progress 


Fili vest without the scales

As soon as I finished sewing, I laid out the scales to check if I had enough. It turned out that I had made too many because I had counted the scales on the real Fili, without thinking that Nina’s measurements are certainly much smaller.


Attaching scales to the Fili vest

Using super glue, I attached all the scales very carefully. No major mishaps aside from the three times that I tore off a piece of finger skin that had bonded with a clay scale.

Fili Vest by Ruby Bayan Llamas
Fili Vest with natural light.

Fili Vest by Ruby Bayan Llamas
Fili Vest with camera flash.

Overall, it was an easy project – a couple hours for measuring and cutting the pattern and material, maybe three to four hours sewing the vest, and an hour gluing the scales. Preparing the 150 clay scales -- conditioning, shaping, baking, and painting -- probably took the longest in terms of manhours. But you really don’t bother counting the hours when you’re having fun!

The best part of all: bragging rights!

Costuming Vest inspired by Fili of The Hobbit


Fili, Lord Elrond, Thorin Oakenshield costumes by Ruby Bayan

Photo taken at the premier of Desolation of Smaug in Manila, December 2013 with Nina (Fili), Dante (Lord Elrond) and Oneal (Thorin Oakenshield).