It only made sense that after building Thorin’s armor vest for Oneal, as
well as the scales that decorated his massive belt, I should also make the belt
buckle. It shouldn’t be difficult. Or so I thought.
Because I used polymer clay in building the scale mail, I decided to also use clay in building the buckle. Just make it look like metal, just like the
scales.
So, I asked Oneal (from halfway across the planet), to give me the
width of his belt, which would be the basis for my design dimensions for the
buckle. And this is what I came up with.
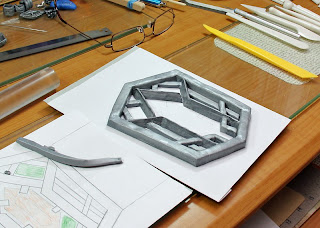
Following the design, I formed and cut my metallic silver clay. It was
looking good but I had a tough time keeping the clay’s sharp corners. Every
time I add something, my fingers nudge what’s already in place and I have to go
back and do damage control.
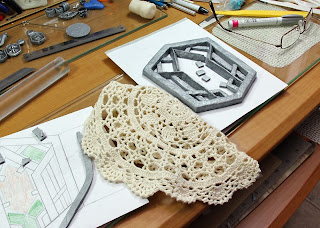
Then I tried to make the clay surface look rough by texturing with a
crochet doily. It worked to some extent.
I guess I was too excited to put the whole thing together, including
the jewels, that it was only after I had baked the clay that I noticed that the
entire thing was off-kilter. The angles were wrong, the depths were wrong,
everything was wrong! And crooked! And it was just horrendous! It looked like an Autobot emblem that melted
under the sun. I junked it.
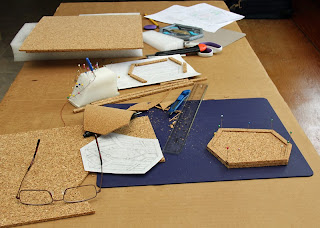
Not to be discouraged, I thought of using a different medium. The clay
was just too malleable. I needed a medium that keeps its shape. Cork!
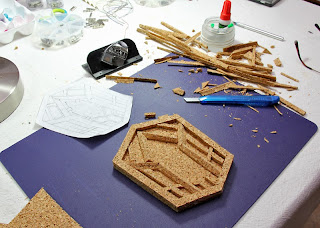
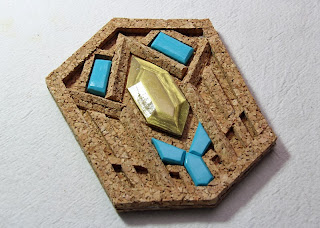
I adjusted the design a little bit, incorporated the backing, and used
a 45-degree cutter (tool for picture frame matting) to make the sharp-edged
shapes in the center of the buckle. It took a bit of practice (and a lot of
cork) to perfect the triangular-edge forms.
Next, the jewels. I didn’t like how the clay ones came out -- even after I tried to make
them shine with a couple of coats of Mod Podge.
It was time to employ my resin casting skills! I cut the jewel shapes
on hard (black) foam, then I pressed each one on a silicone mold. When the mold
cured, I poured some resin, which I tried to color with blue food color. The
food color didn’t blend well with the resin because there are tiny blue spots
in the cast, but it turned blue enough to pass for Thorin's buckle's precious jewels (you won’t
see the spots unless you look really close).
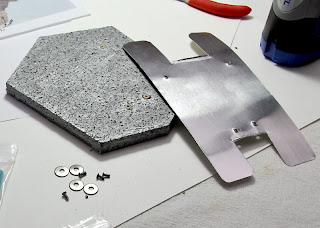
My next challenge was to design a way for Oneal to attach the buckle to
the belt that he has out there, twelve time zones away. I thought of suggesting superglue (he won’t really have to remove the
buckle from the belt, right?). But what if he wants to change the buckle to one
that says “Elvis”? So I thought of just screwing an aluminum sheet plate to the
back of the cork buckle, with tabs that he can bend and fold around his belt for a
perfect fit. (Note that I had to insert/glue onto the cork a set of dowels to screw the plate on.)
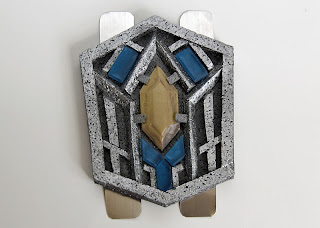
Adding a few shades of metallic silver acrylic paint made the cork look
very close to the movie version Thorin buckle. Glue the jewels on and… done! Now doesn't that look so much better than my clay *fail* attempt? But hey, you never know
until you try.
Yes, I know, it's still not an exact match to the movie version, but I bet if I try a third time, I'll get it just right!







8 comments:
Very good work, this! I'm working on my own Thorin outfit, I hope you don't mind if I steal some of your techniques!
Thanks, Luciano! By all means. Glad I could help. :)
Hello, first of this is amazing work. secondly i'm going to try to remake this for my costume i plan on wearing to the hobbit part two in 2 months.
so if i may, what is the Cork medium you used called?
Thanks for the kind remarks. The cork is just plain cork squares that you can find in craft stores. They are commonly used as bulletin boards for pinning notes and messages. Hope that helps.
Hey im just wondering what the Size or measurements of the sides of the buckle are? thanks in advance
The size measurements of the buckle would depend on the width of your belt. The vertical height of the left and right sides should be equal to the width of the belt. Then you just estimate the rest of the dimensions. Well, that's how I did it. :)
Hey i was wondering if a Exacto-Knife would work for "carving" the Intricate design that holds the gems in place. as i do not have the type of tool you used.
Yes, of course, you can use an Exacto-Knife. You only need to have a steady hand to maintain the sharp angle.
Post a Comment