Another Thorin Oakenshield costume accessory I determined I could also
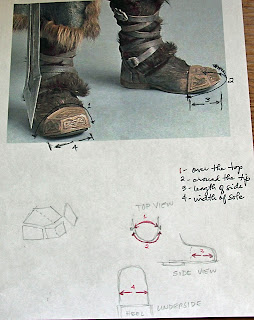
do was his boot caps. Fortunately, there’s a good image of them available
online.
Because I would again be making these accessories for Oneal, who’s
several thousand miles away, I asked him to take comprehensive measurements of his boots to where the
caps would attach. He was quick to illustrate his numbers.
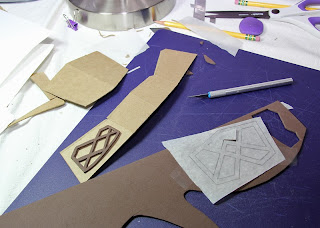
Based on Oneal’s measurements, I came up with a paper pattern of what I
figured would be the best way to execute the angular forms of the toe tips.
There would be a two-section top panel, and a four-section side-to-side panel with tabs
to glue the top panel on.
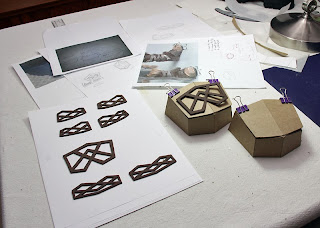
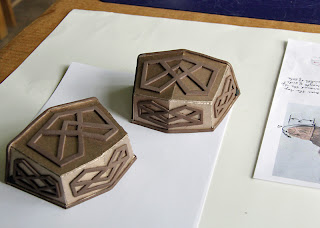
The caps would be made out of a type of cardboard called chipboard – the
kind used as backing for sketch pads. I’ll cut the dwarven designs from craft
foam, glue them onto the chipboard, and paint the caps to look just like in the
movie. It was relatively straightforward.
I added a tiny strip of foam along the outer edges and gave the chipboard a
base paint of light brown. Then I superglued the cutouts in place.
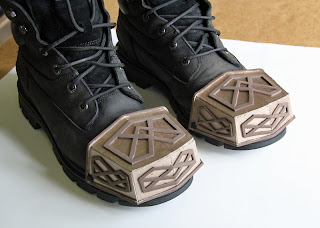
This is how the caps looked on my husband’s biker boots (two sizes bigger
than Oneal’s) before the painting phase.
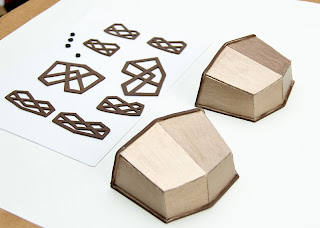
I used a combination of gold, silver, bronze, and black acrylic paints to give
the caps the semi-metallic weathered look.
Not bad. I’m a little uncomfortable though, at how the caps look a little too
shiny compared to the movie version. I told Oneal to maybe add another layer of
matte brown and some more weathering (maybe beat them up some) to make them not
look like they came from Lord Elrond.





8 comments:
Hi Would you Link or E-Mail the paper pattern that you designed?
:-)
Realy good work best wishes from Germany
(Hmm something strange with this website)
Hi,
would you send the paper pattern you created to other people?
Best wishes from Germany
Keep up the excelent work!
Hi, the pattern would depend on the size of the shoe. You will have to get the measurements of your shoe and "guess"timate the dimensions of the geometric patterns. The shapes are clear on the photos, so you can derive your design from there. Hope that helps.
-Ruby
Thank you for posting this tutorial I have just finished cutting out my card board, everything looks great....for my Dwarven Tux for my wedding...
Congratulations, Mike Brown! I'm glad my tutorial has been helpful. Have a grand wedding! :)
I'm curious...how did you attach the cap to the boot?
Hi Jeremy, Thorin here. I just used two small strips of soft velcro attached to the boots on each side of the toes and then hard velcro on the inside of the toe caps. That way I can still use the boots for other costumes
Post a Comment