Showing posts with label fruits. Show all posts

June 17, 2014

How to Freeze Grapes for Smoothies

Grapes are a staple in our morning smoothie because their sweetness neutralizes the “green” taste of the veggies. I chose to use frozen grapes to cool the smoothie just right. After a few trials and errors, I discovered the best way to freeze them.

The first thing I do is wash the bunch of grapes. Then I pick each grape from the vine so that I won’t have to deal with the stems later on. I roll them on a paper towel to dry them. Then I grab a colander and arrange them very nicely in one layer.

Freezing grapes in a colander.

Then I place the arrangement in the freezer. The colander helps freeze the grapes evenly and quickly. After a few hours, I transfer the grapes to a container that will reside in the freezer until all the fruits are consumed.


Frozen grapes for smoothies.

I don’t bother to put the frozen grapes in a zipper bag because they don’t last too long in the freezer anyway -- in about a couple of weeks, they’d have all been added to our smoothies. Every morning, I just quickly grab a handful to add to our drink.

Of course, I’ve tried freezing grapes in bunches – stems and vines together. But when I’m picking the fruits to put in my smoothie, I have to fumble with pulling out all the frozen little stems, and in the early hours of the morning, I don’t particularly appreciate cold fingertips.

I’ve also tried freezing individual grapes on a baking sheet and in a plastic container. They work fine but I find the colander trick the neatest yet. 

June 4, 2014

How to Slice Watermelon into Chunks

I grew up feasting on watermelon the old-fashioned way: sinking my teeth (and face!) into a freshly sliced wedge of that crunchy, cool, and juicy fruit (it’s also a vegetable) with its sugary-sweet nectar dripping down my chin, neck, and elbows! Slurp!

When I moved to the States, watermelon became a delicacy, presented as chunks sealed in clamshell packs at the supermarket. You need to use a fork (or tiny skewer) to eat it. Where’s the fun in that?

But yes, forking watermelon chunks makes sense these days because sticky hands don’t go well with our ubiquitous handheld devices. The downside of buying prepared watermelon is you pay a premium for the labor and packaging.

How about saving a bundle by buying a whole watermelon and spending a few minutes slicing it into chunks? I promise, it only takes a few minutes and you’ll have a big bowl of chunks you and your friends can conveniently fork into while you’re playing video or board games!

Let’s start.

1. Buy a whole watermelon – the cheapest option. It’s going to be heavy, so plan ahead. If you won’t cut the entire fruit into chunks, you will need space in the fridge to store the uncut portion.

Watermelons

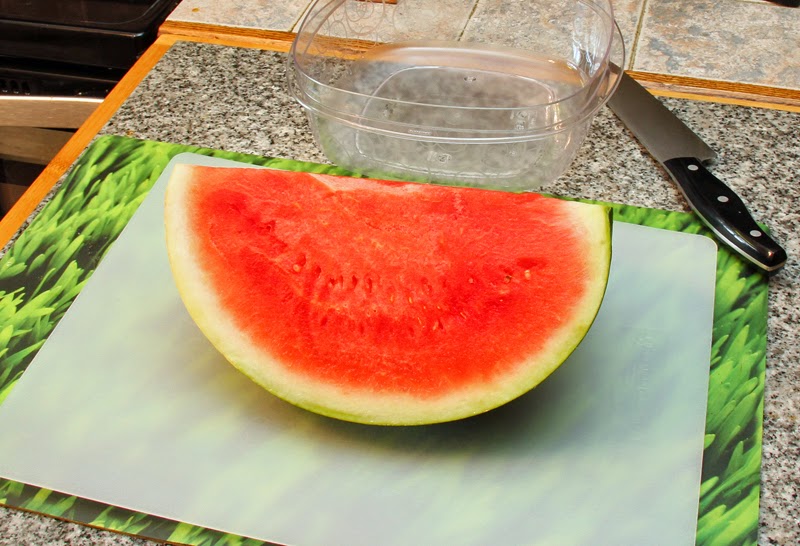
2. Slice the watermelon into quarters (some places sell watermelon quarters – you see the flesh and you don’t have to deal with a huge fruit). Work with a quarter at a time, unless you’re ready to consume the prepared chunks within 3-5 days (they get soggy and taste weird after a week).

Slice watermelon into quarters

3. Lay the quarter with the skin on top, away from you – it makes for easier, more stable cutting rather than if the skin were underneath. Trust me I’ve tried it all sorts of ways.

Slice watermelons into chunks

4. Make vertical cuts about an inch thick. Use a large kitchen knife to help with cutting through the skin. When done, switch to a paring knife and ready the container for the chunks.

Slice watermelons into chunks

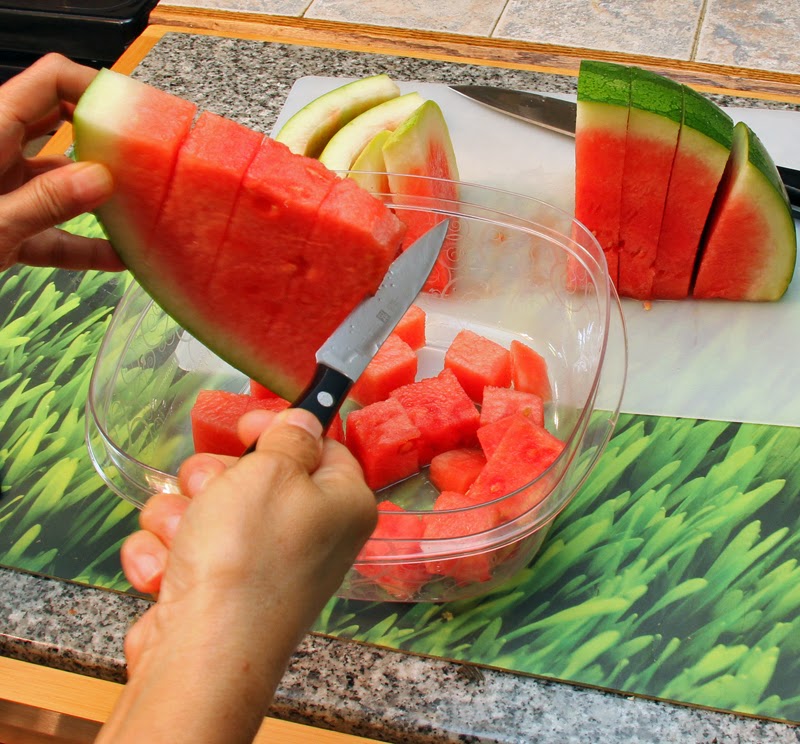
5. Pick up a slice and cut the flesh vertically about an inch thick, down to where the flesh meets the inside of the skin.       

Slice watermelons into chunks

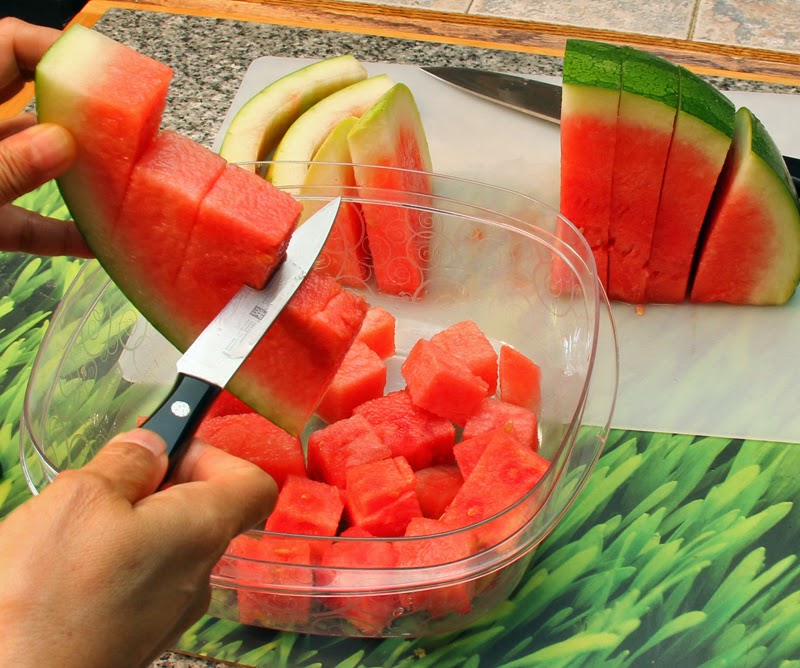
6. Make perpendicular cuts, also an inch thick, letting the chunks drop into the container.

Slice watermelons into chunks

Slice watermelons into chunks

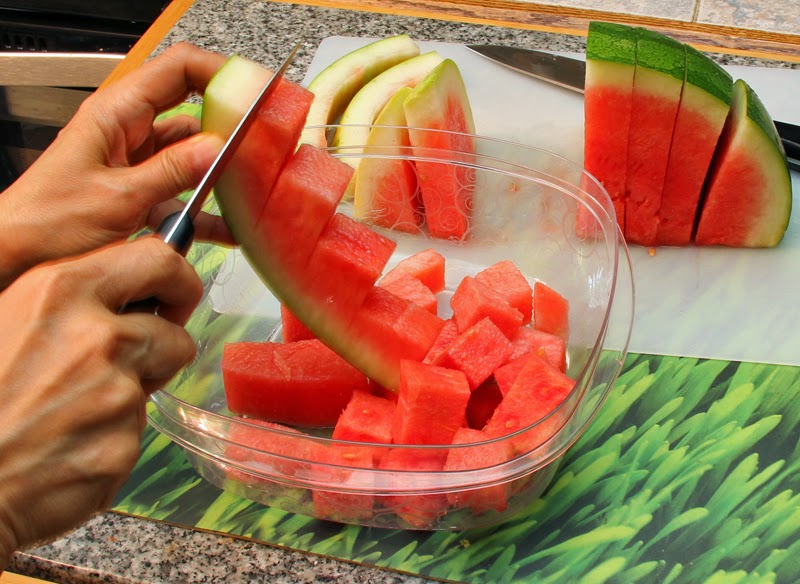
7. Cut off the remainder of the flesh by running the knife from the top to the bottom of the slice, along the edge of the skin. Be careful not to nick your fingers!

Slice watermelons into chunks

Slice watermelons into chunks

Do the same with the rest of the slices, and there you have it. Look at how much a quarter of a regular watermelon yields! And no sticky chin!

Watermelon chunks


May 26, 2014

How to Slice Pineapple Into Chunks

Pineapple season is here, and the “fruit,” which is actually a mass of berries growing along the bromeliad’s stalk, is once again popular in all grocery produce sections. It’s time to talk about how to slice them.

Born and raised in the Philippines (the top pineapple producing country in the world), I grew up with little appreciation for any kind of fruit juice other than pineapple. I also learned how to peel and cut pineapples without wasting any of the sweet and juicy flesh.

I’ve seen two convenient ways to prepare pineapples. One is to use a pineapple corer/slicer that cuts into the pineapple with a rotating blade and leaves the core and the skin behind. Another is to pare off the skin thick enough to include the “eyes” leaving a clean flesh for slicing. Both ways are quick and easy but wasteful because a lot of the delectable flesh is discarded in the process.

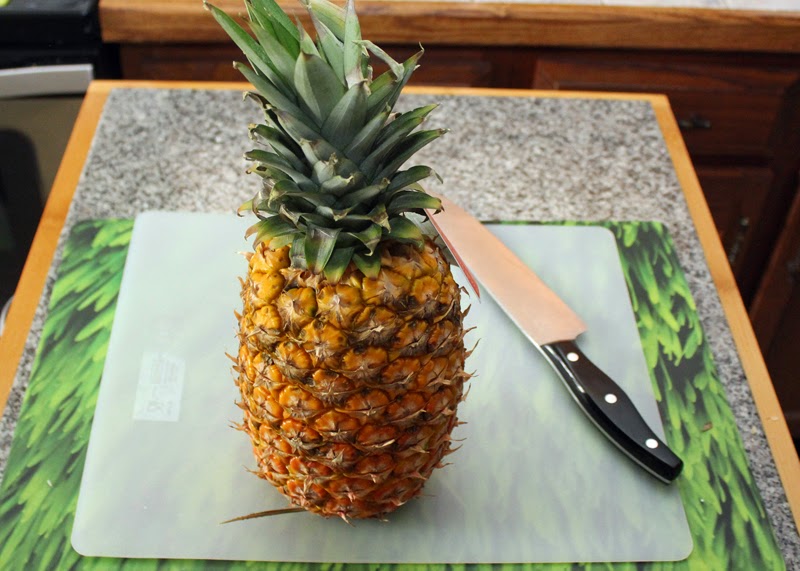
Here’s how I was taught to prepare a whole fresh pineapple into bite-size chunks without being wasteful [quick tip: wear plastic gloves to protect your hands from the acidic juices of the pineapple]:

Del Monte Pineapple

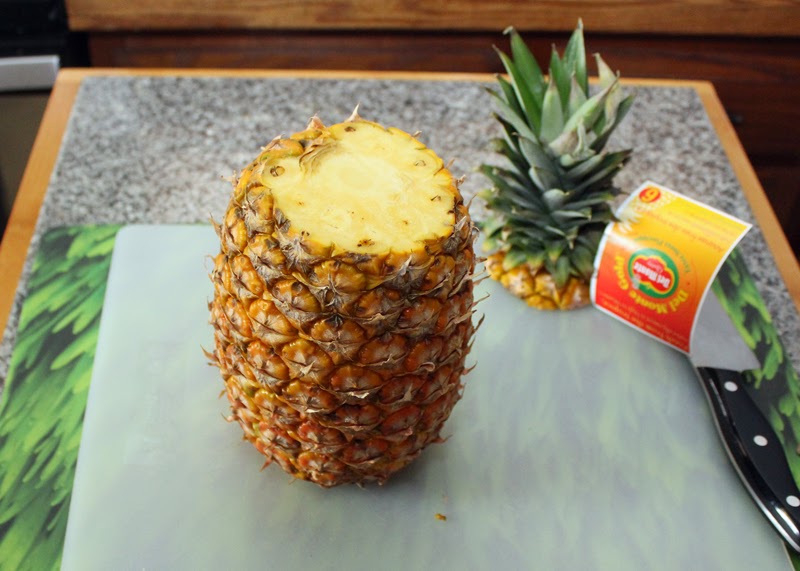
1. Slice the top off.  [Consider planting this top in your garden. It will take a couple of years before you can harvest your own one pineapple from it, which will most likely not be as big nor as sweet as what you could get from the grocery, but it’s always cool to say you grew your own!] Slice the bottom off too.

Pineapple - slice the top off.

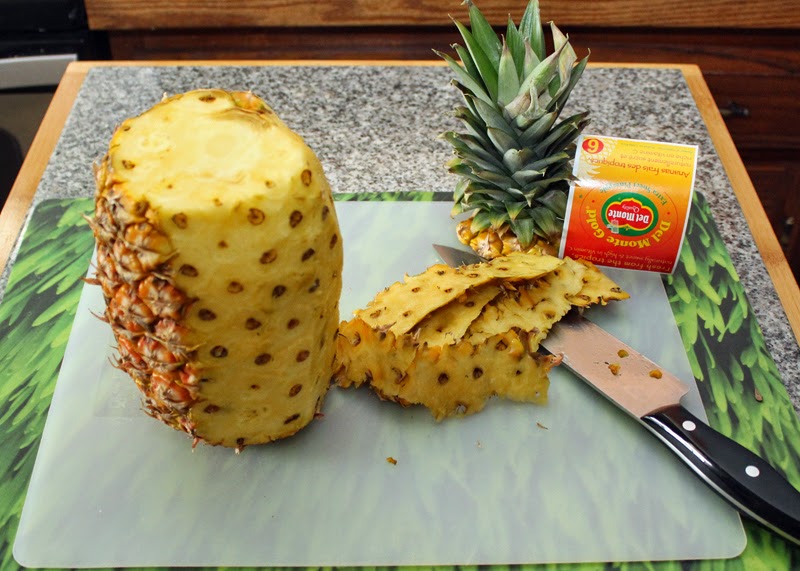
2. Cut away the skin just thin enough to expose the flesh. Parts of the “eyes” should still be on the fruit. You can skin the pineapple in a spiral or horizontally – I prefer to skin vertically.

Pineapple - cut away the skin.

3. Following the spiral pattern of the eyes, cut along the sides of the eyes to take them out. You can run the knife with one long spiral cut on one side of the eyes, from the top of the pineapple to the bottom, then a matching spiral cut on the other side of the eyes to scoop out the whole length. I usually work with two to three eyes at a time.   

Pineapple - take the eyes out.

Pineapple - take the eyes out.

4. Quarter the pineapple lengthwise and cut out the tough core. [Some folks who are into juicing don’t discard the core.]

Pineapple - quarter.

Pineapple - slice off the core.

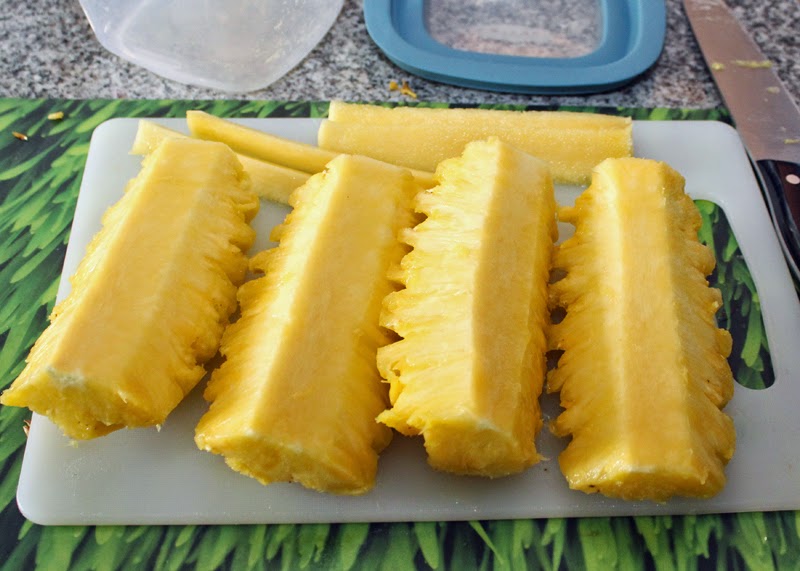
5. Halve each quarter lengthwise. Cut into bite-size pieces and enjoy!

Pineapple - slice lengthwise.

Pineapple - cut to bite-size pieces.


I enjoy my fresh pineapple chunks as is, with some salt or sugar, to flavor water, or as an ingredient of our breakfast smoothie. How do you enjoy yours? 

May 19, 2014

Breakfast Smoothie For Two

Our new massage therapist introduced us to the concept of taking raw fruits and vegetables first thing in the morning. While she was actually telling us about juicing, Mike and I decided that we would rather go with blending (aka smoothies). Juicing reduces the fruits and vegetables into liquid form, hastening absorption by the digestive system; blending chops and grinds the whole food, letting you consume the beneficial fiber of the fruits and vegetables.

After I did more research on the benefits and process of juicing and blending, I became more convinced that I prefer smoothies over juice. Besides, juicers are costly and harder to clean compared to blenders.

Our therapist suggested only three ingredients for the breakfast mix: carrots, cucumbers, and beets. She said that by taking these, first thing in the morning, we will not only become healthier but also feel better.

Because my research opened my eyes to this healthy sipping of plant nutrients, I thought: why not add what we’ve always known to be nutritious too, like celery, lettuce, spinach, ginger, and parsley? To neutralize the earthy taste of the beet root, I added strawberries, grapes, and banana. Nuts would be a great source of protein, so I threw in some chopped almonds. Then I read about the omega-3 and antioxidant properties of flaxseed, so I ground some and added that to our mix.

Breakfast Smoothie Ingredients

Breakfast Smoothie before blending

Sometimes I would vary the combination – oranges instead of strawberries, apple instead of banana. Sometimes the liquid would be no-sugar grape or apple juice, sometimes plain water. Most times I would add an infusion that we drink throughout the day: filtered water with slices of lemon, cucumber, and ginger (this one I learned from a friend who has been taking the infusion to keep her weight down).

Infused Water with Lemon Cucumber Ginger

Every morning, for the past 35 days, Mike and I have been having this smoothie for our first breakfast. To make the mixture refreshingly cool, I sometimes use frozen carrots, grapes, and strawberries, then throw in a couple of ice cubes. Some folks suggest frozen bananas or mixed berries.

Breakfast Smoothie before and after blending

Fruit and Vegetable Breakfast Smoothie for Two

So far, Mike and I appreciate the sipping of raw fruits and vegetables in the morning. It gives us a nice kickstart to our day. And with it, we’re already assured of ingesting at least two of the required number of servings per day. That’s certainly better than the “whenever” we were used to.

Here’s a quick list of what I include in one tall mug of our breakfast smoothie:
  • 5-7 sticks baby carrots (could be frozen)
  • 3-4 slices cucumber
  • 2 medium stalks celery
  • 2 thin slices ginger (more than that and the ginger taste dominates)
  • 1 thin slice beet root (makes the smoothie red)
  • 1 grab-full mixed greens (spinach, chard, lettuce, arugula, frisee, radicchio)
  • 1 small bunch parsley
  • 1 medium to large strawberry
  • 5-7 medium grapes (frozen is cool)
  • ½ ripe banana
  • 1 tablespoon crushed almonds
  • 1 tablespoon ground flaxseed
  • Ice cubes after blending
Other ingredients to try soon:
  • kale
  • broccoli
  • romaine
  • cantaloupe
  • mango
  • avocado
  • walnuts
  • cashews
  • chia seeds
  • blueberries
  • raspberries
  • blackberries
Why don't you try it? Then tell me how it goes.

August 1, 2006

Caimito and Chico

The two fruits I terribly miss out here in the US: the sweet and soft purplish caimito (Star Apple) and the sweet and grainy brown chico (Sapodilla).

My brother and I grew up climbing the caimito trees fronting our house. We had our own favorite branches where we’d while away the lazy afternoons of youth… almost like waiting for the fruits to ripen right next to our faces. Just sit on a branch, reach for a shiny tender one or two, and gorge away.

Friends and neighbors passing by would see us lounging on the branches; we’d pitch them as many ripe caimitos as they could carry. Most of the time, Papa would be at the foot of the tree, catching fruits my brother and I tossed down -- our very own version of "playing catch."

I remember though, that I never ate the Star Apples piled high on our dining table fruit basket. Not even the ones cooling in our refrigerator. I only ate caimito that I had just picked from our trees with my own hands -- fresh, organic, pesticide-free. Good old days.

Our chico tree was a different story. The tree itself was too dense to lounge in, plus it hosted the life cycles of all kinds of bugs -- spiders, mostly. You’d have to work your way through webs, ants, and aphids to get to the good branches, and then you’d have to literally go out on a limb to reach the fruits. The chico tree taught us how to pick fruits from the ground, using a really long stick rigged with a wire loop (to snag the fruit) and a bag (to catch the snagged fruit) at the end.

Ah, memories of long ago and far away. Our parents were the best; they made sure my brother and I had a wonderful childhood growing up alongside an assortment of fruit trees.

Oh yes, we also had guava, mango, tamarind, santol, avocado, guyabano, and kamias, all lush and fruit-bearing in our yard. I have poignant stories about each of these trees. I’ll write them one of these days.

April 1, 2006

With lemon, please!

According to an herbs-for-health book I read, lemons help digestion. Of course, that’s aside from the fruit's Vitamin C benefits. Another expert suggested adding a slice of lemon to every glass of water you drink. Hmm... I can follow that advice. Better yet, I can also add lemon to every glass of soda I drink.

So, do I cut off a slice each time I feel like a drink? I tried that for a while but it’s too much of a bother to get the lemon from the refrigerator, put it on a board, pick up a knife, cut off a slice, then return the lemon to the fridge, and wash the knife and board, every time I feel like a drink with lemon. Nah... too much work.

So, do I pre-cut the lemon, put the slices in the refrigerator, and pick up a piece every time I have a glass of soda or water? I tried that but the slices deteriorate faster than I can consume them.

So, do I freeze the slices so they don’t deteriorate? Tried that, too, but the slices stick to each other as they freeze, making it impossible to pick up just a slice.

After thinking it over real hard… I figured out a way. And I will share this little secret with you!

***NOTE: The tips and photos have been migrated to: How to Freeze Lemon Slices

Here's to everyone's digestion!