All the hard work crafting the Hobbit-themed costumes come down to this: the Manila premiere screenings (Dec 9 & 10, 2013) of The Hobbit: Desolation of Smaug. I present the attires and costume elements that passed through my production worktables. [Click on the images for higher resolution.]
Lord Elrond's full costume worn by my son, Dante.
These next photos were taken at the advance screening for the New Zealand Embassy in Manila.
Here are the costumes that incorporate my contributions: Thorin's scalemail armor, belt buckle, and toecaps; Fili's leather vest; and Kili's accent (collar/vambrace/baldric) scales.
My bragging rights:
Showing posts with label handmade. Show all posts
December 11, 2013
September 6, 2013
The Hobbit: Thorin Oakenshield Boot Caps
Another Thorin Oakenshield costume accessory I determined I could also
do was his boot caps. Fortunately, there’s a good image of them available
online.
Because I would again be making these accessories for Oneal, who’s
several thousand miles away, I asked him to take comprehensive measurements of his boots to where the
caps would attach. He was quick to illustrate his numbers.
Based on Oneal’s measurements, I came up with a paper pattern of what I
figured would be the best way to execute the angular forms of the toe tips.
There would be a two-section top panel, and a four-section side-to-side panel with tabs
to glue the top panel on.
The caps would be made out of a type of cardboard called chipboard – the
kind used as backing for sketch pads. I’ll cut the dwarven designs from craft
foam, glue them onto the chipboard, and paint the caps to look just like in the
movie. It was relatively straightforward.
I added a tiny strip of foam along the outer edges and gave the chipboard a
base paint of light brown. Then I superglued the cutouts in place.
This is how the caps looked on my husband’s biker boots (two sizes bigger
than Oneal’s) before the painting phase.
I used a combination of gold, silver, bronze, and black acrylic paints to give
the caps the semi-metallic weathered look.
Not bad. I’m a little uncomfortable though, at how the caps look a little too
shiny compared to the movie version. I told Oneal to maybe add another layer of
matte brown and some more weathering (maybe beat them up some) to make them not
look like they came from Lord Elrond.
August 11, 2013
The Hobbit: Lord Elrond Costume: Summary
It took me 6.5 months to build the Lord Elrond costume from scratch. I
worked on the project sporadically though, mainly because I had other things to
do, but sometimes because I was stumped. While I tried hard to get the whole
project organized and planned out, there were times when I would suddenly
realize that something I initially thought would work wouldn’t. At that point,
I would do something totally different (like Fili's vest) until a lightbulb of an idea would
come up.
Thankfully, I managed to make it all come together. On the
whole, I’m quite happy with how the costume turned out.
This page serves as the jumpoff point for the build pages of the
various elements of my Lord Elrond Costume. May you all be inspired.
August 10, 2013
The Hobbit: Lord Elrond Costume: Final
The final touches were attaching the stud covers to all the
bare studs on the vambrace and boots, spraying acrylic sealer to all the
surfaces covered by Mod Podge to seal in the tackiness of the gloss finish.
Here’s the “Wearing Sequence” panel I created to show how to
wear the armor pieces in order.
And here’s a shot of my favorite McDonald’s Minion, Dave,
who says, “Ba-nah-naaah”.
My showcase poster:
… and my outdoor shot to show the natural color of the
armor. Also shows how hot I was, falling out of bed and into my
husband’s boots at 11 am -- I mean, literally hot -- it was 95F in the shade that August morning.
August 9, 2013
The Hobbit: Lord Elrond Costume: Boot Armor
The boot armor that I made is actually a cheat. On the stock
photo of Elrond, I couldn’t tell if the armor was actually overlapped bands
with silver edgings. For my purpose, I decided to just use a flat piece of
vinyl, backed with heat-curved foam, and accented with silver polymer clay
crisscrossed
stripes. Then I used loops (same system as the back of the vest), to wrap the
“armor” (more like a shield) onto the boot.
So that’s what I did.
I punched holes where I would attach the loops for the back
laces, brushed on some Mod Podge, and attached Velcro to the bottom tabs to
anchor the armor to the sole of the boot. Easy as pie.
August 8, 2013
The Hobbit: Lord Elrond Costume: Cape
What’s a Lord without a cape? This particular elven lord
wears a royal-red one what flows sleekly with every stride. I found a bright
maroon microsuede fabric at JoAnn’s on sale. Three yards was more than enough
for my son’s height. The pattern was
easy, just a straight cut with a slit for both arms.
My challenge was how to make it sit on the shoulders
squarely and still lie flat behind the neck no matter how tightly the armor
vest is worn. My solution was a garter/elastic strip along the back of the
neck, and snaps to attach the cape to the shoulders of the vest.
I had to hand-sew the gather on each shoulder and use hot
glue to attach the vinyl strip that would have half of the snap. I attached the
other half of the snap onto the shoulder of the vest.
My mistake was I didn’t look to see if I had a brown elastic
band, which I had. It would’ve been less obvious than the white one I used (and I was too tired to re-do it).
Here’s a photo of the snap solution.
I made a couple of medallions using polymer clay. I pressed
the raw clay on a round metal pendant that had swirlies. After baking, I
painted it with silver, then bronze acrylic. I superglued the brooch pin
hardware to the underside so that I could attach it to the cape. Later on, I made the medallions
shiny with Mod Podge.
And this is the finished cape on the dress form. It works!
August 7, 2013
The Hobbit: Lord Elrond Costume: Chest Armor
The chest armor, which is the highlight of the costume, was
actually the biggest challenge for me. It took me a long while to adjust the
lames to fit the measurements of my son. I stared at the Elrond photo for
hours, trying to figure out how to make the lames look that way.
I was just glad I had the time, and the craft paper, to do
so many revisions and adjustments to make it right. Until finally, I got it
right. Almost.
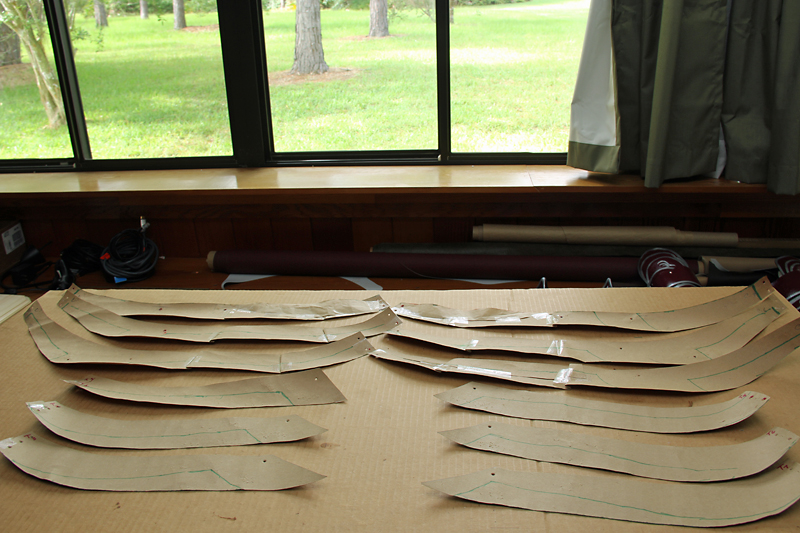
Notice that my original paper pattern had seven lames on
each side. At the last minute, I decided to have only six because my son does
not share the 6’4” height of Hugo Weaving. When I took out the bottom lame, the
chest armor actually looked better.
So, I taped the final lame patterns to the vest and drew all
the overlap lines. Then I punched the holes through the patterns and the vest,
where the actual studs would be.
Then I traced the pattern onto the vinyl, cut the vinyl,
prepared the clay, attached the trim, and glossed with Mod Podge -- same
procedure as the vambrace, pauldron, and hip armor. Drawing the overlap lines
on the chest pattern helped in positioning the clay swirl pieces on the final
vinyl bands.
The closure for the vest was the next decision point.
Buckles or laces? This time my son and I agreed on laces. The laces will make
the vest more adjustable and comfortable to the wearer. Either way, he will
need a second pair of hands to close the vest but the laces will be more
forgiving. In any case, they won’t be seen under the cape. So I attached loops
to the back of the vest using studs.
And I hammered the lames in place.
And here’s the chest armor, front and back. It wasn’t that hard after all! Well, it became easy after I finalized the paper pattern.
Subscribe to:
Posts (Atom)