Showing posts with label DIY. Show all posts

October 31, 2015

Autumn Leaves Lamp Project

“We need a lamp over this coffee station,” my husband said back in 2003. Rather than run out to a home improvement store, I took it on as a DIY challenge.

I did a quick inventory of my crafts materials stash and decided I would use the fall leaves I had gathered from the Blue Ridge Parkway, North Carolina, the previous autumn season. Three types of big maple leaves will be excellent for the lamp design I had in mind.

This was the lighting solution I created back then, hung above our apartment’s coffee station. It served as a task light as well as a mood light for our nighttime activities.

Autumn Leaves Lamp over coffee station

Our apartment’s wall décor evolved over the years, but the lamp remained a fixture.

Autumn Leaves Lamp over coffee station

When we moved to our new home in 2007, the lamp became a nook light in the living room.
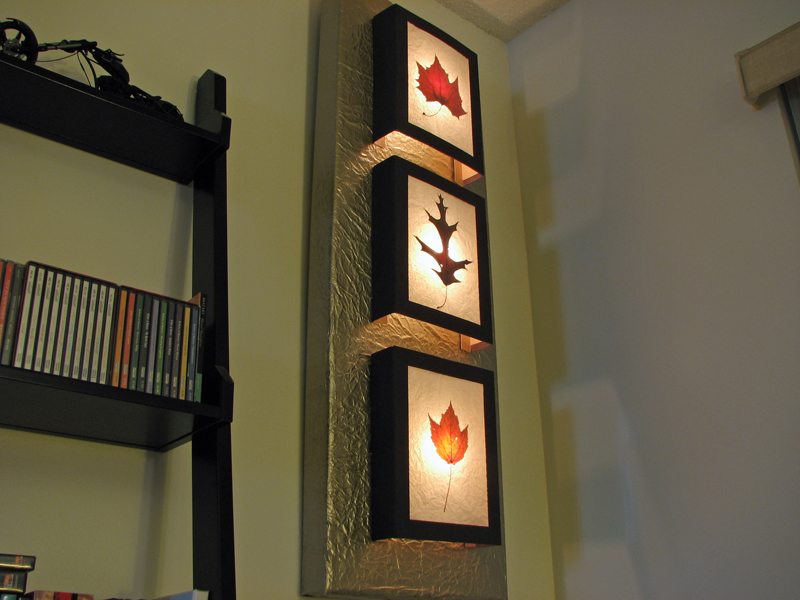
Autumn Leaves Lamp as a nook light

Autumn Leaves Lamp as a nook light

In 2009, we transferred it from the living room to the bedroom, where it became our nightlight until we moved overseas in early 2015.

Autumn Leaves Lamp as a nightlight

Because it would be impractical to ship the lamp halfway across the planet, and getting rid of the leaves was out of the question, I decided to dismantle the lamp and transport the three leaf panels.

Last week, at about the same time I picked up these fallen maple leaves 13 years ago, I built the lamp again. It hangs in its new location in our bedroom, to continue to serve as our nightlight for many more years.    

Autumn Leaves Lamp as a nightlight

Here’s a quick overview of how I made the leaf lamp:

Each pressed leaf is white-glued between plain white tissue paper and a transparent sheet protector. This sandwich is framed in cardboard, folded so that there’s a 2-inch tab to elevate the leaf panel from the base. Slip-in tabs attach the panels to the baseboard without adhesive.

Autumn Leaves Lamp leaf panels

Autumn Leaves Lamp

The baseboard is a sturdy recycled cardboard folded and taped to form a box-frame that’s hollow in the back. I cut slits on the baseboard to coincide with the slip-in tabs of the leaf panels.

Autumn Leaves Lamp baseboard

The first time around, I used crumpled gold gift wrap to cover the cardboard base. This time I painted the baseboard with a metallic bronze shade to jibe with the brownish leaves.

Autumn Leaves Lamp baseboard

The electrical elements are the basic wire, switch, plug, sockets, and lightbulbs. The lighting setup uses the traditional parallel wiring. The electrical is taped to the back of the box-frame, with each light sticking out through the cardboard base, centered behind each leaf.

Autumn Leaves Lamp electricals

Autumn Leaves Lamp lights

Autumn Leaves Lamp

These autumn leaves have been with us since the fall of 2002. And it looks like they will stay with us for much longer. That’s rather impressive.


October 18, 2015

Captain John Hart Costume Project


Oneal is back with another costuming project for me. He is attending a Dr. Who theme wedding and wants to go as Captain John Hart from the spinoff “Torchwood.”

I asked, “Who?”

He said, “Yes.”

I asked again, “Captain Who?”

He said, “No, Dr. Who. Captain John Hart.”

Before I could open my mouth again, he showed me the online photos of Captain John Hart. He said that’s the jacket he wants to wear to the wedding. 

Captain John Hart of Torchwood

Oneal said he will look for a jacket of the same color and texture and I can just convert it. Add the braid and buttons accessories, and adjust the collar and sleeves.

Easy as pie. If he can bring me the jacket (so I won’t have to make one from scratch), I’ll do the required renovations.

The search for the jacket took a few weekend trips to where jackets are sold. Remotely, he consulted with me on the options he found.


Oneal searching for the right jacket.

One had black sleeves, one looked like salmon, one looked like eggplant. We agreed on the maroon corduroy. I could make it work.

Next was the search for the braid material, or technically, the soutache. And the brass buttons. After total fails at several sewing stores, he landed at Carolina’s where they had these fancy options:
  
Searching for the right soutache.

Since it was going to be a wedding anyway, we agreed to use the white one with the silver trim (but without glitter or crystals). Here’s our messaging about the soutache and buttons.


He ended up buying a whole roll of the soutache (60+ feet) and the store's entire stash of gold buttons (a dozen more than we needed).

With all the materials available, I went to work. Digging through the sewing accessories I hauled from the US, I determined that the best way to work with the soutache is with a sticky stabilizer and fusing tape. Keeping an eye on the reference photo, I estimated the size and shape of the area the soutache will cover and cut a paper pattern.

Materials for the Captain John Hart chest braid.

This part required a lot of patience but the result was remarkable!

Making the Captain John Hart chest braid.

The next step was to sew the soutache onto the jacket. Two straight lines for now, just to hold the panel in place. Final stitching will be done after the fitting.

Sewing the soutache onto the jacket.

Oneal went searching again, this time for dark blue corduroy material that I will use for the sleeves and collar. But his search was a bust, so I said, “How about I use a blue microfiber that I have in my fabric stash? I will show you.”

This was the jacket Oneal tried for a final fitting. Just a few buttons, and pins all over the place.

Captain John Hart jacket in pins.

The jacket passed the fitting.

Captain John Hart jacket project Before-and-After.

Achievement unlocked!

Here’s Oneal at the wedding, with his wife wearing the project in my next blog entry.

Oneal at the Dr. Who theme wedding as Captain John Hart.

August 8, 2015

Organizing Recyclable Plastic Bags

Recyclable plastic bags don’t always get reused right away, so they accumulate in the dark recesses of your kitchen cabinets. And when it’s time to reuse, you “ukay-ukay” (dig) into them frantically looking for the right size bag for your purpose. It’s like stashing your underwear in your drawer without folding and then rummaging through everything looking for that particular piece you want to wear. No offense to folks who choose this kind of excitement but, to me, it’s an inconvenience (yes, I fold underwear).   

This was my stash of recyclable plastic bags before I found a way to organize them:

Stash of recyclable plastic bags.

I figured that all I needed was some simple manner to quickly identify the bags, keep the same sizes together, and make them quickly accessible for reuse. So, let’s see what we have around the house. Aha! A stash of empty tissue paper boxes. (Hah, I bet you were sure I had those piled somewhere.)
  
Empty tissue boxes for repurposing.

Now to put up a grid to identify the bags. I’ll need a piece of paper as large as the largest recyclable bag I have in the stash (could’ve recycled a brown paper bag but I had just cut up the biggest one in my pile into a costume pattern). I sorted the bags according to size (I was surprised there were only five universal sizes) and drew the measurements onto the paper to serve as a handy guide. Then I taped the paper to the inner side of the cabinet door.

Grid of plastic bag sizes.

I labeled five tissue boxes accordingly, and slipped the bags into their respective storage containers. And there they are!

Organized recyclable plastic bags.

Organized recyclable plastic bags.

Now it’s a snap to put away the bags and pull out the right-sized bag for the purpose. No more unsightly stashing, fumbling, and rummaging. Recyclable bags organized. Just like my underwear.  


April 24, 2015

Cardboard Spice Rack #3

When you move into a new place, you don’t always have the amenities you’re used to. In my case, our new residence has no spice rack. Nowhere to organize my spices! It does have a blank wall above the sink, which is the only open space available in our very conservative condo-type kitchen area. I figured it’s the best place to install another handcrafted cardboard spice rack (I had created two before – one for our old small apartment in Orlando, another for a friend).

I have an inordinate (wow, “inordinate”) amount of cardboard, aka moving boxes, so this simple shelving project would make a teeny tiny dent on my stash.


Measure the wall, estimate the spice container sizes, cut up the cardboard, fire up the glue gun, splash on some leftover paint, and there it is: my third cardboard spice rack of all time.


Recycled cardboard project

Preparing the spice rack frame

Painting the spice rack

Mounted cardboard spice rack.

April 20, 2015

Upcycled Pot Holders

When you realize that you didn’t pack pot holders when you relocated from the other side of the planet, you quickly make some by repurposing a couple of face towels that you did pack a lot of.  

To make the pot holder different from the face towel, I decided to hand-sew the seams, creating a pocket to slip the hand in. And I hand-embroidered these: “POT HOLDER” and “PAN HANDLER.” Catchy.

Problem solved.


Pot Holder and Pan Handler

Pot Holder and Pan Handler

Pot Holder and Pan Handler

Upcycled Face Towels

Upcycled Face Towels

Upcycled Face Towels

May 31, 2014

Cardboard Shadow Box Project

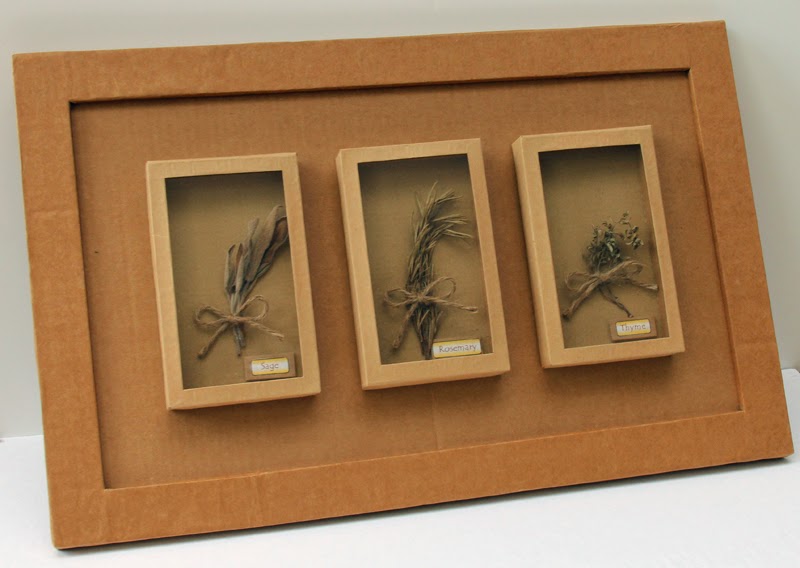
My creativity is mostly prompted by necessity. With no spare finances to purchase shadow boxes to encase some dried herbs I wanted to display, I resorted to making my own. My medium of choice was what I had plenty of: cardboard and brown paper.

First, I cut and glued cardboard pieces together to form small rectangular box frames and wrapped them with brown paper to cover the seams. For the window panes of the boxes, I used clear hard plastic cut out from product packaging that I had stored, thanks to my packrat foresight.

Cardboard Shadow Box

Then I prepared the backing for the shadow boxes. I printed out the names of the herbs and mounted them on tiny pieces of cardboard to serve as nameplates. Then I punched two holes in the middle of the backing, strung twine through, and tied down (with a nice ribbon knot) a bunch of the dried herbs I wanted to showcase.

Cardboard Shadow Box

Cardboard Shadow Box

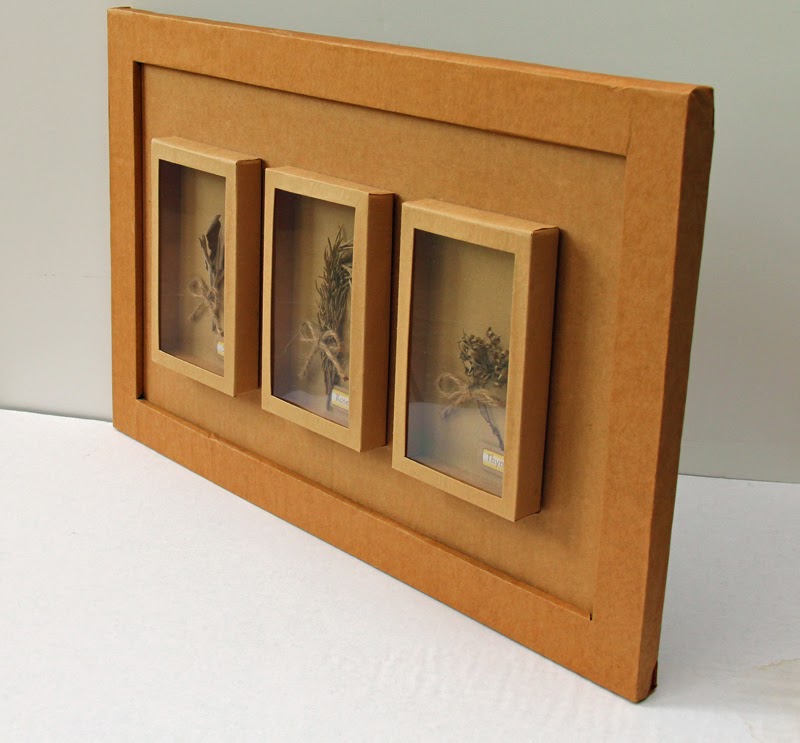
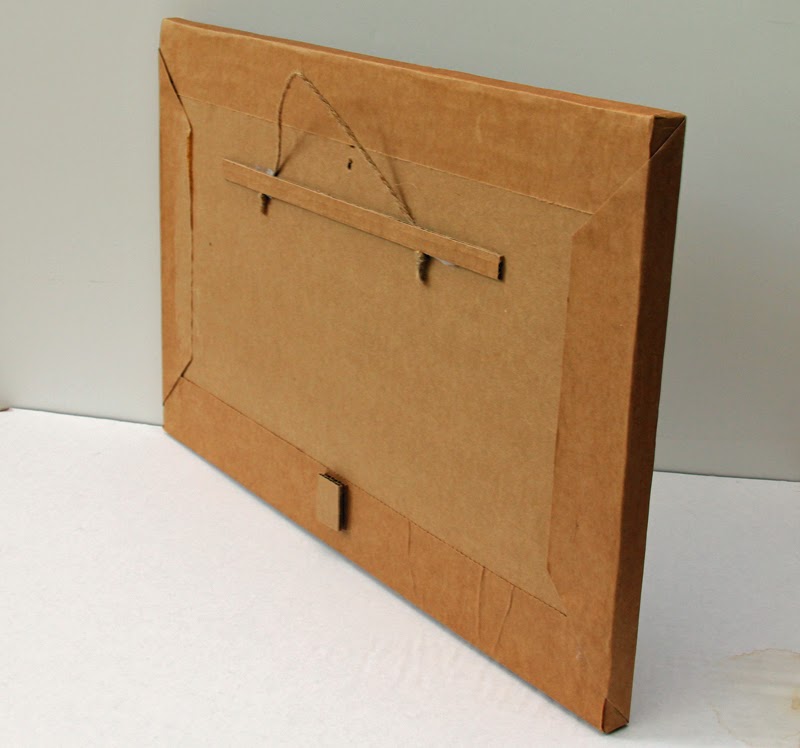
The final assembly was just a matter of gluing the backing to the shadow box frame, and gluing the finished box to the main frame that I prepared also with cardboard and brown paper. Add a twine hanger to the back, and there it is – all natural, very lightweight, and entirely handmade.

Cardboard Shadow Box - back

Cardboard Shadow Box for showcasing dried herbs

I took these pictures a few days ago, but I made the shadow box back in 2002 (which is why there are no step-by-step build photos). The herbs look old and droopy now but the presentation is still good.

January 8, 2014

Dice Pouch Project

The challenge was to make several pouches for an assortment of board game dice. The pouches would be given away as tokens to fellow gamer friends. The options for the material to use were paper, netting, suede, felt, or any kind of fabric that would serve the purpose. Nothing too fancy; after all, the pouch just needed to hold seven regular-sized dice.

After pulling out a number of drawers of materials I could use, I remembered that I had scrap leather from an old jacket I bought at a garage sale. It’s genuine leather that has natural wear and distress. And even though the scrap pieces are relatively small sections, they would be just fine for the size of the pouches. This was what I had been waiting for -- the chance to recycle/repurpose that old leather jacket!

I went ahead and made a prototype – two sewn-together panels with holes for a pair of drawstrings. It came out really nice!

Dice Pouch Prototype

Leather Dice Pouch Prototype

Because the scrap leather had been in storage, I decided to give each section a good cleaning. We keep a bottle of leather cleaning and polishing solution for our boots, bags, and other leather goods – I put it to really good use!

After the clean-up and polish, I traced the pouch panel pattern on the leather. Because the leather’s wear patterns were not uniform, I made sure that the paired panels came from the same swatch or were at least similar in discoloration. While scissors were good for the panels, the rotary cutter was most efficient for cutting the drawstrings.

Leather dice pouch pattern

Punching the holes was next.

Leather dice pouch punching holes

Then I just sewed the panels together, smooth side in, and pushed the seam to flip the panels smooth side out. It’s with projects like this that I’m glad I have a heavy duty sewing machine.

Leather dice pouch sewing

What I like about leather is you don’t need to worry about the edges fraying -- construction of the pouches was quick and trouble-free.

What took the most time was threading the drawstrings. A crochet hook would help, but I discovered that a pair of tweezers made the job pretty easy.

And here are the leather pouches, ready to be filled with dice. Mission accomplished.


Leather dice pouch batch