October 13, 2012

Hobbit Armor Costume Scale Mail Tutorial - Clay Scale

A group of family members are costumers -- they put a lot of effort in building their attire and accessories as close as possible to the theatrical originals. They already have a lot of experience creating near-perfect replicas of costumes from Star Wars, Lord of the Rings, and other popculture favorites. Right now they are gathering forces again and this time gearing up some dwarves for the premiere night of The Hobbit in December.

How did I get involved in this? My godchildren Oneal and Rej called my attention to the first photo releases of the Hobbit dwarves back in January when I visited Manila. They said they have decided to be Thorin (Oneal) and Kili (Rej) and wear the costumes when the movie opens at the end of the year. They showed me the photos and presented a challenge: "How do we make the scale mail?"


They posed this challenge the night I conducted a jewelry-making tutorial for them and their friends. One of my sessions was about how to make beads and pendants with polymer clay -- it was easy to conclude we could make the scale mail with polymer clay .

So, as soon as I returned to Florida, I started working on the clay scales. The first thing I did was design clay replicas patterned from the different scales on Thorin's armor (later on, Kili's coat too). I baked those, and from them I pressed and baked fresh clay to create the negative molds.

Polymer clay molds for the scales of Thorin Oakenshield's scalemail armor costume.


The series of photos below shows how I use the negative molds to create the scales that will be painted and attached to the armor shirt that will be worn by Oneal.

1. Prepare a "release agent" -- this prevents the raw clay from sticking to the negative mold. I use KY Jelly mixed with a little water (just to water down the jelly a bit).

KY Jelly as release agent for the clay mold.

2.  Paint the release agent on the surface of the negative mold, making sure to reach all the crevices. Don't forget the edges -- the excess clay will stick to the edges if you miss them.


3. Condition a ball of polymer clay, just enough to cover the negative mold.


4. Press the clay onto the mold. The outside surface will become the back part of the scale, so it needs to be flat. Push the excess clay to the sides.


5. Gently pull out the fresh clay from the negative mold. Try not to tug too hard because the scale will get deformed. Lift the edges around the mold before pulling out the entire scale.


6. Lay the clay scale on a flat surface, preferably glass or ceramic. Gently adjust the clay if it got deformed in the pulling process.

Positive mold of scale for Thorin's scalemail armor costume.


7. Use a sharp blade to cut off the extraneous clay from the edges of the scale.


7. Bake the clay scales following manufacturer's directions. (I use Sculpey Premo and it bakes at 275F for at least 30 minutes.)


8. Let it cool down and paint as needed.

Polymer clay rendering of Thorin Oakenshield's scalemail armor costume.


And there's the first batch of scales, already baked and ready for the painting phase.


July 11, 2012

Turbo Tuna Dubliner Melt

This morning, I ran out of my comfort food (vienna sausage and scrambled eggs), so I had to improvise. I saw a can of tuna and I remembered how I used to like tuna sandwiches. Since I had all the ingredients on hand, with the Turbo Cooker at the ready, I decided to whip up a new comfort (ehem, healthy) food.

Let me share my quick and easy way to a Turbo Tuna Dubliner Melt on Honey Wheat:

Drain a can of Chunk White Albacore Tuna (Starkist Very Low Sodium seems to be my new favorite).


Toss with sea salt, freshly ground black pepper, chopped sweet onions, sweet pickle relish, and light mayonnaise (I'd put capers and chopped celery if available). Load tuna mix and a thick slab of Dubliner cheese on slices of honey wheat bread.


Turbo toast until cheese melts.


Slap warm slices together.


Enjoy with favorite greens on the side. Yum! Healthy comfort food.

April 27, 2012

Kitchen Tip: Store Salad Greens For Weeks

Those packages of pre-cut salad greens at the supermarket are pricey because you pay for the processing and the packaging. If you buy the greens in their original harvested form, at the farmer’s market or local grocery store, you will not only get the freshest veggies (next to harvesting from your own backyard) but also save some pocket money.

The challenge is how to keep the greens fresh in the refrigerator for the length of time it takes you to consume all of it. It’s not really a challenge because all you need are plastic bins, paper towels, and a propping device. 

I found the ideal plastic storage bins at a home improvement store. They serve the purpose because they are long enough to fit a whole romaine head and deep enough to fit an average green lettuce head.


Before I store the greens, I pluck out the compromised (bruised) leaves and rinse the heads to remove whatever sand and dirt are stuck in there. If the leaves are a bit limp, I soak the whole thing in water for about half an hour to revive them. Then, a gentle shake to remove the excess water and they’re ready for the bins.

Because contact with too much moisture promotes leaf decay, and the bottom of the bin is where the excess water gathers, I address that concern two ways: I put a double layer of paper towels to absorb the excess moisture in the bin, and I install a propping device over the paper towels to hold the greens away from the wet towels. For my romaine and greenleaf lettuce, I used a plastic packaging tray.


That plastic tray was originally the packaging tray of quail eggs that we bought at an oriental store. It was just what I had on hand; I could’ve used a stack of plastic spoons or a few sauce containers. I actually used several water bottle caps for my iceberg lettuce bin (I’m the Recycle-Repurpose Queen!).


The point is to slightly lift the greens from the bottom of the container to allow air circulation and minimal contact with a wet surface.

The bins are not air-tight (veggies need to breathe too) but they seal well enough to keep the greens from drying out in the fridge. Keeping them in their own containers also ensures they don’t get poisoned by the ethylene gas from certain fruits we also keep in the fridge.


But here’s my biggest reminder: make sure your refrigerator temperature is set no higher than 40 degrees F (4.4 degrees C); the wrong temperature will hasten spoilage.

Another tip: make sure the bottoms of the lettuce heads are facing the back of the fridge. Reason: it’s colder near the back wall of the fridge; leaf tips could freeze. 


April 24, 2012

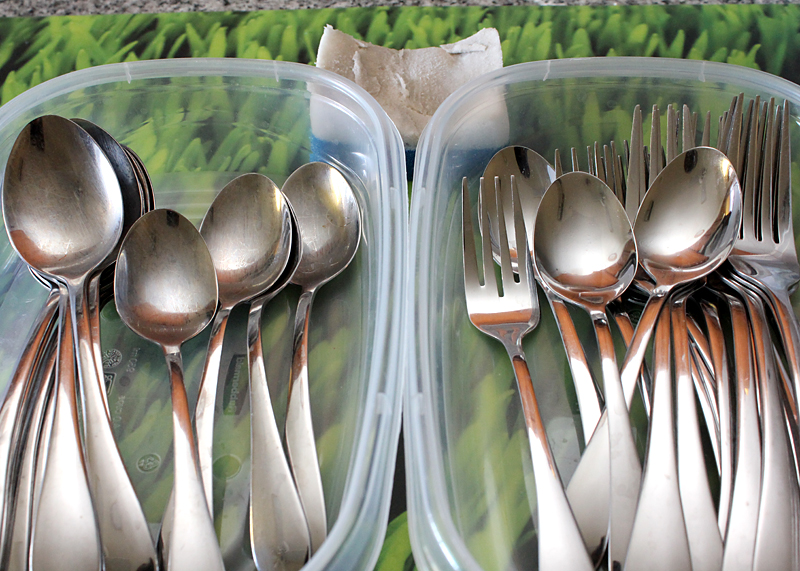
Less Stain from Stainless Flatware

If you're anything like me, you toss your used flatware in the sink, then gather all of them in the dishwasher waiting for the appliance to be full enough to run a wash. Then after about a year, you notice that your once-shiny stainless flatware are all cloudy and cruddy. You try to remove the crud by hand-washing the spoons and forks with a sponge and dish detergent but the shine never comes back.


If you're anything like me, you try "The Eraser" because it can clean everything!

Then you hear yourself scream, "Whoa! Check this out!"

Yes, the all-around Eraser (available as Mr. Clean Magic Eraser and Scotch Brite Easy Eraser) is the answer.


Wet the pad, slide it over the flatware surface just a few times, and watch the spoons and forks become shiny and new again! Rinse with clean water and towel dry. Revive several sets of stainful stainless flatware in just a few minutes.

If you're anything like me.

April 8, 2012

Asking for Directions


I keep thinking about how we could've been more helpful. We were at a red light at an intersection near Seaworld. The guy driving the car next to us, apparently a tourist, rolled down his window and asked, "How do we get to Downtown Disney?"

After thinking quickly because the light was about to change, Mike said, "Go straight, take the ramp to I-4 West."

The guy repeated the instructions then the light turned green. Mike said to me as we drove away, "Well, he'll figure out that he has to go into the 67 exit, and find his way again."

Now I'm thinking, there were other ways to reply to the guy's question:

1. Speak real fast and say, "Go straight, take the ramp to I-4 West, take the 67 exit to Lake Buena Vista, then turn right to State Road 535, then turn left to Hotel Plaza Blvd, then turn left at Buena Vista Drive. Downtown Disney will be to your right. You want me to repeat that?"

2. Say, "Punch 'Downtown Disney' on your GPS and follow the voice prompts."

3. Say, "Use your phone's navigation app."

4. Say, "Google Downtown Disney."

5. Point to the 7-11 at the corner and say, "Go there and buy a map."

6. Resist the urge to say, "It's complicated" and straight-face fib, "We're not from around here. Sorry."

7. Raise an eyebrow, look at the traffic light, stare back at him, and say, "Seriously?"

On second thought, Mike's instructions couldn't have been more helpful. If the guy went up the ramp to I-4 West, he would've eventually seen all the huge signs, one of which is at the nearest exit that says "Downtown Disney".

Downtown Disney