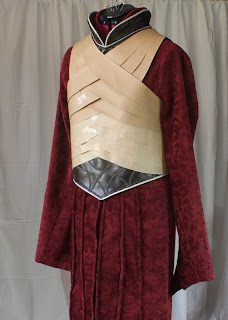
The chest armor, which is the highlight of the costume, was
actually the biggest challenge for me. It took me a long while to adjust the
lames to fit the measurements of my son. I stared at the Elrond photo for
hours, trying to figure out how to make the lames look that way.
I was just glad I had the time, and the craft paper, to do
so many revisions and adjustments to make it right. Until finally, I got it
right. Almost.
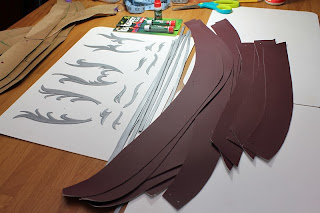
Notice that my original paper pattern had seven lames on
each side. At the last minute, I decided to have only six because my son does
not share the 6’4” height of Hugo Weaving. When I took out the bottom lame, the
chest armor actually looked better.
So, I taped the final lame patterns to the vest and drew all
the overlap lines. Then I punched the holes through the patterns and the vest,
where the actual studs would be.
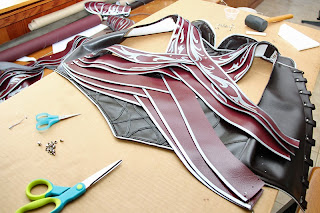
Then I traced the pattern onto the vinyl, cut the vinyl,
prepared the clay, attached the trim, and glossed with Mod Podge -- same
procedure as the vambrace, pauldron, and hip armor. Drawing the overlap lines
on the chest pattern helped in positioning the clay swirl pieces on the final
vinyl bands.
The closure for the vest was the next decision point.
Buckles or laces? This time my son and I agreed on laces. The laces will make
the vest more adjustable and comfortable to the wearer. Either way, he will
need a second pair of hands to close the vest but the laces will be more
forgiving. In any case, they won’t be seen under the cape. So I attached loops
to the back of the vest using studs.
And I hammered the lames in place.
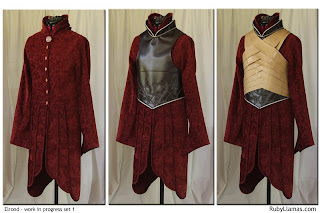
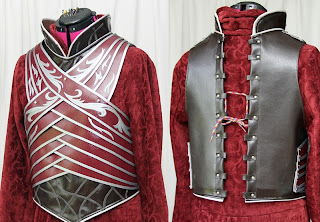
And here’s the chest armor, front and back. It wasn’t that hard after all! Well, it became easy after I finalized the paper pattern.
And here’s the chest armor, front and back. It wasn’t that hard after all! Well, it became easy after I finalized the paper pattern.





No comments:
Post a Comment