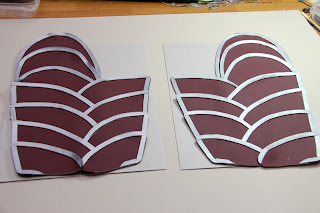
While I had printed out an arm bracer pattern from a
generous soul who posted it online, I still had to make my own, based on my
son’s arm measurements. It should neither be too long nor too short, so I had
to adjust the dimensions and curvature. The dress form was
really helpful in providing perspective.
I decided to use vinyl, attached to heat-shaped craft foam
as the base where the plates would be attached.
When I was satisfied with how the paper pattern looked, I
traced them onto the vinyl and cut the pieces out neatly.
The next step was making the clay trim. I had estimated the
total measurement of the silver edges on all the plates of the whole armor and
came up with 900 feet of a quarter inch width of clay. That’s a long piece of
clay. I tried freehand slicing but I couldn’t keep a steady hand to make the
quarter inch width, so I devised a tool. I glued two pointed blades, a quarter
inch apart, on some popsicle sticks. Voila!
And there are the bracer plates with the silver edge trim.
I hand-stitched a hard heavy-duty thread along the edges of the vambrace base just for
effect.
Then I needed to decide on how the bracers would be worn. I
asked my son if he wanted buckles or laces. We agreed on buckles, which he
could manage without help. So I went to the Tandy Leather store to get some
buckles (for my purpose, these were the best ones they had, and I couldn't find any other source). Then I made my own
closures with the same vinyl I used for the vambrace base.
The step that’s not pictured here is when I painted the
plates with Mod Podge to make them shiny. I had tried various ways to make the
vinyl shine, like polyurethane, white glue, and polymer clay gloss, but Mod
Podge is the one that dried out the shiniest.
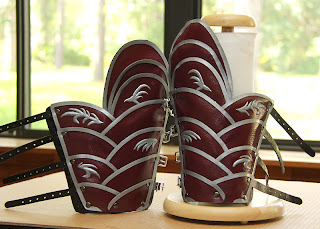
Then I punched holes and hammered studs to attach both the
plates and the buckles simultaneously to the vambrace base.
And wow, it worked!


No comments:
Post a Comment