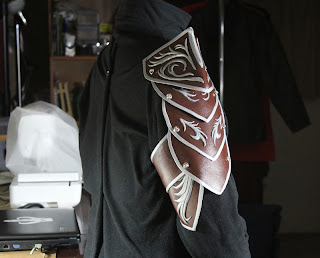
After the success of the costuming gig of my son’s friends
at the premiere of The Hobbit: An Unexpected Journey, I started thinking, “My Thorin scalemail costume
was a hit! Which Hobbit costume should I do next?”
I thought of making Nori, one of the dwarves, to help
complete their roster, but when I asked my son if he would be okay wearing that
costume, he wasn’t sure. I asked if he would rather be inside a helmet and
armor, like maybe one of the elven guards. He replied, “If I’m going to be one
of Elrond’s guards, I might as well be Lord Elrond.” And that was my go signal.
The next costume project has been identified.
I googled all the images of Lord Elrond wearing the plate
armor (there was only one stock image that was used to promote the movie, and
Elrond appeared in the film in that armor for less than two minutes). With what
was available, I diligently deconstructed the complex, layered costume so that
I could wrap my head around the challenge. I tried to draw all the costume
elements, figuring out how each piece would fit into the entire attire.
In determining the construction of the costume, my mandate
to myself was to ensure that the attire would: (1) not maim my son, (2) be
relatively easy to put on, and (3) stay intact for the duration of the
costuming event (hopefully longer). Since I would be building everything from
scratch, I had the freedom to choose the materials that approximate what they
actually used in the movie.
Although the elven armor looks like sheet metal (which they
probably forged for the movie), I wasn’t inclined to go that route. First,
metal is expensive, and second, I’m not too hot on taking a crash course on
metalsmithing just to make this costume (maybe next time). Ergo, I hopped around
town to gather fabric (for the tunic and cape) and my chosen substitute for
metal: marine vinyl.
My next challenge was figuring out how I would construct the
silver trim along the edges, as well as the swirl designs, of all the plates of
the armor. I tried sewing a silver piping. I tried gluing all sorts of silver
ribbons. I tried strips of foam. I tried foam paint. I tried hot glue. I tried
paint effects. Nothing worked. I took a breather.
I thought I should try to make a pattern for the pauldrons
(shoulder armor). I said that if I could make the pauldron shapes look like the
movie version, I’ll be good. I cut some paper, and I attached it to my dress
form. It looked okay. I could do this.
Then suddenly it dawned on me. I could do the edge trim, as
well as the swirl designs, using my favorite medium: polymer clay. So I cut
some vinyl using the paper patterns, molded some clay, and put them all
together into a prototype. It worked!
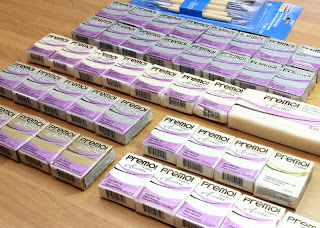
So I decided to get as much clay as I could. When Michael’s
put the Premo clay on sale for $1 each, I picked up all the silver ones from
the three stores near our place.
I was ready.
Note: this next photo was taken after the costume was
completed, but I will post it here now, to show the tools and accessories I
used for the project. It doesn’t show the heavy duty sewing machine and the
toaster oven (for baking polymer clay).


2 comments:
How did you bake the polymer clay? Did you form it, bake it, then apply it? Or can you bake it at such a low temperature that the vinyl it's going on isn't damaged?
Simply amazing work! Thanks for sharing!
Thanks for the kind words. Yes -- form, bake accdg to package instructions, and glue onto the vinyl.
Post a Comment